Contents
- Introduction
- Prerequisites
- Resources
- IDE Configurations
- Program a
@GETAPI - Program a
@POSTAPI - Exercises
- Further Reading
- Troubleshooting
- Tutorial Video
Introduction
RESTful web services are built to work best on the Web (REST: Representational State Transfer). REST is an architectural style that specifies constraints such as uniform interface and enable services to work best on the Web. In REST architecture, data and functionality are considered resources, and accessed them by using Uniform Resource Identifiers (URIs). There are some motivations of using RESTful Web Services:
- Open protocols and standards used for exchanging data between applications or systems;
- High interoperability (e.g., between Java and Python);
- Resource representation such as XML, JSON;
- Data exchange via HTTP methods such as
GET,POST,PUT,DELETE.
The objective of this tutorial is to help you to get familiar with programming APIs, especially understand the idea of microservices architecture.
Prerequisite
The examples discussed in this tutorial were programmed using the following software and tools:
Resources
- Sample Code with Dependencies/Libraries
- Dependencies/Libraries only
- The above resources are also available on this GitHub repository
- [Video] How to configure Apache Tomcat, import and run the demo project
IDE Configurations
We first need to configure Apache Tomcat by extracting it to your local disk after downloading the source file. We note that the path to Apache Tomcat directory should not contain any whitespace or special characters. Then, you should follow the steps below to configure Apache Tomcat in Eclipse IDE:
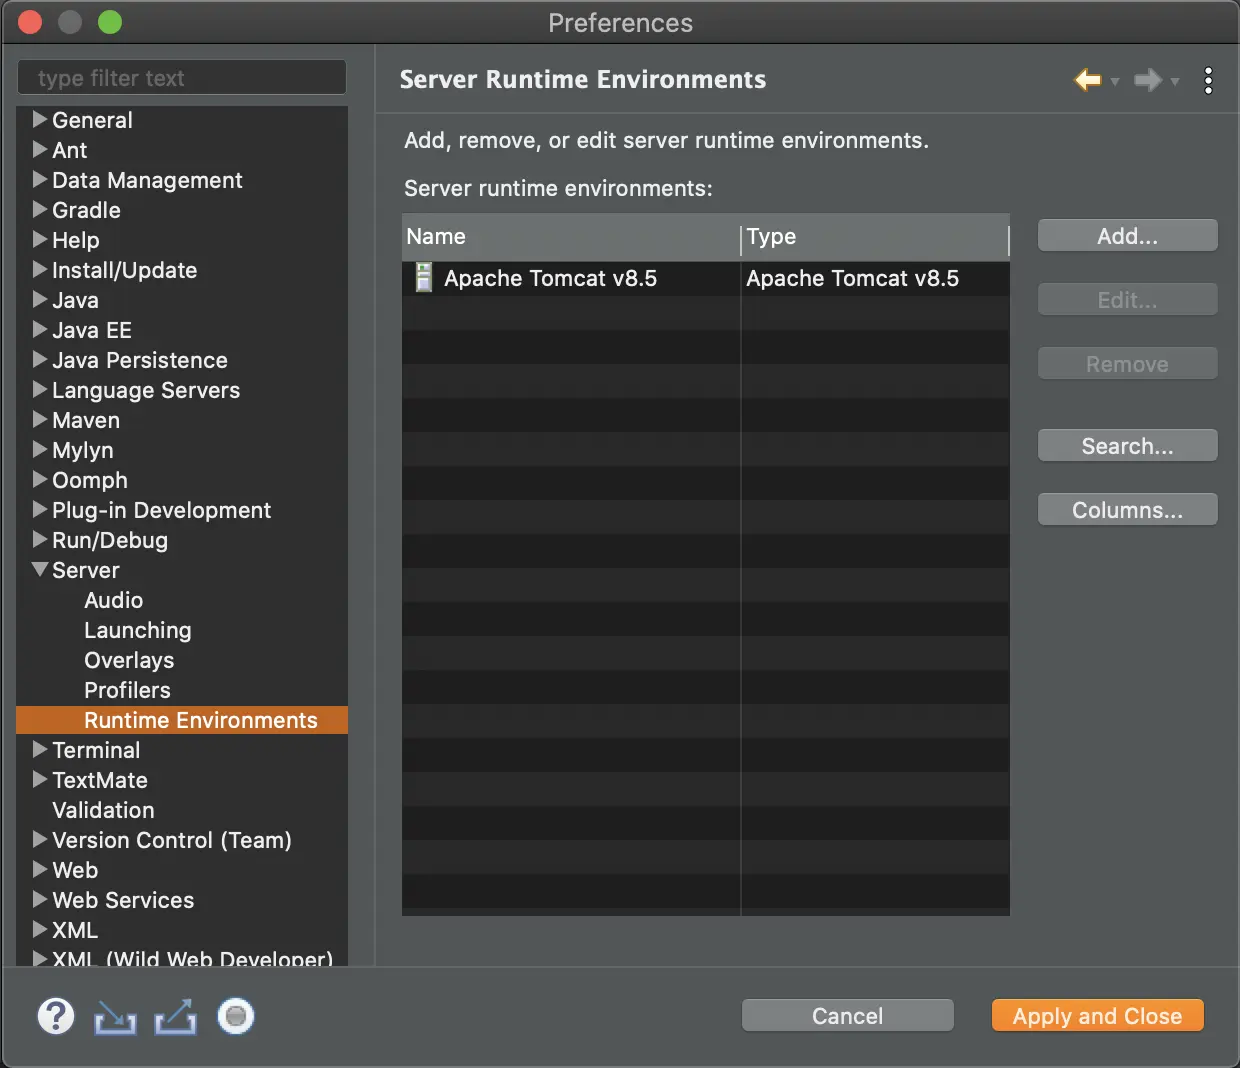
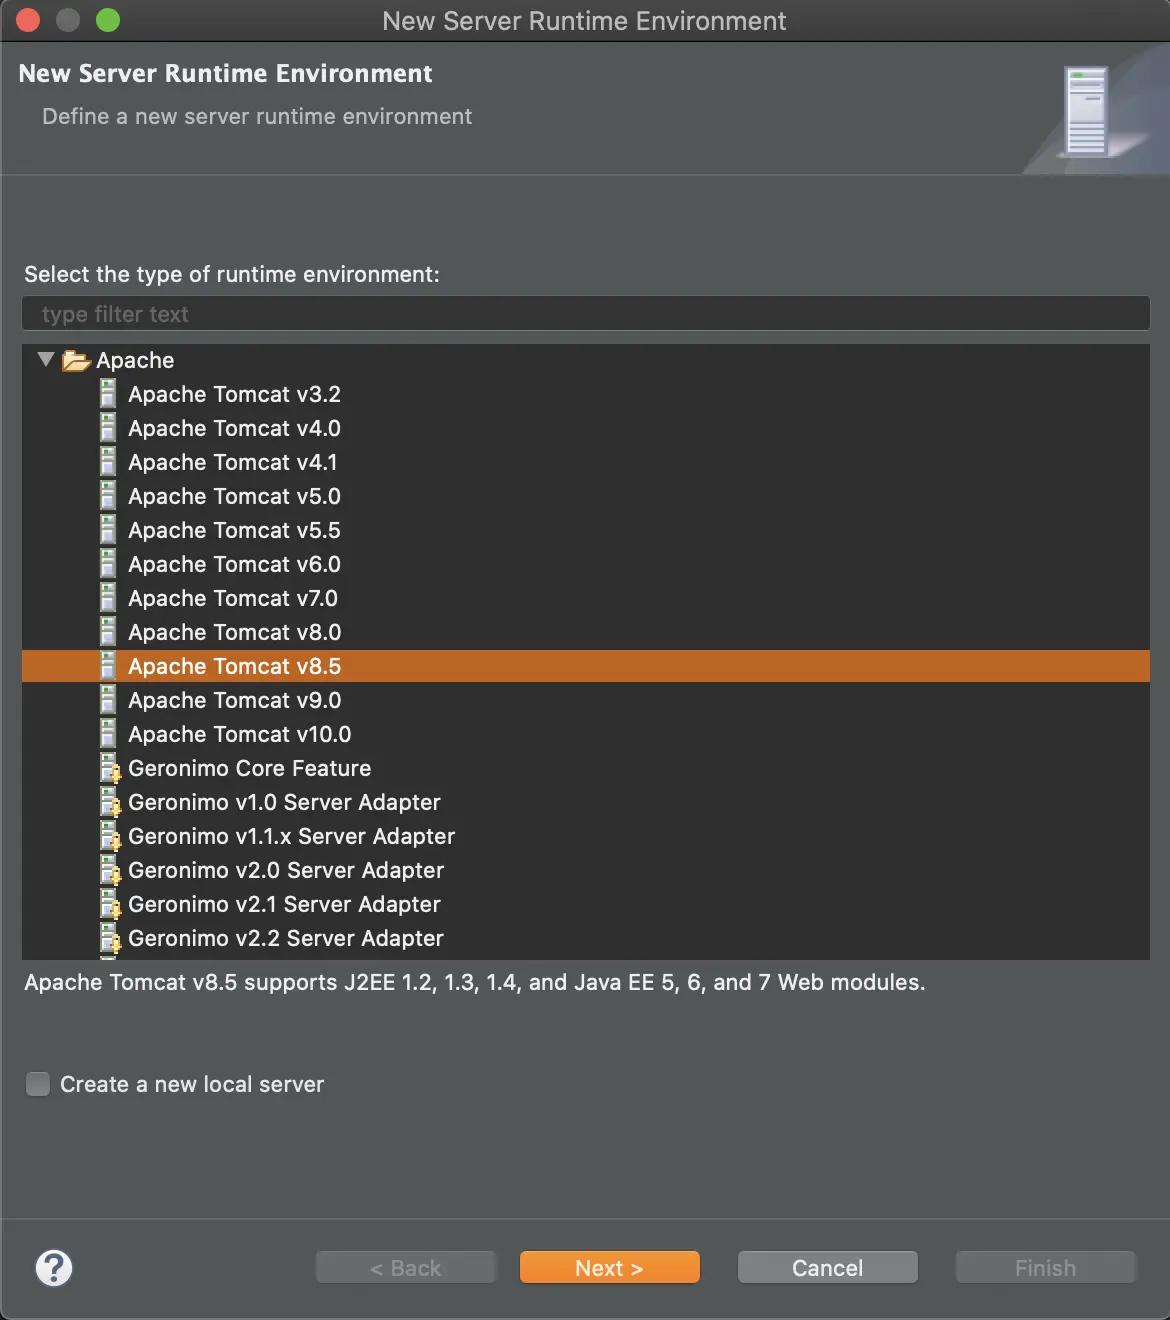
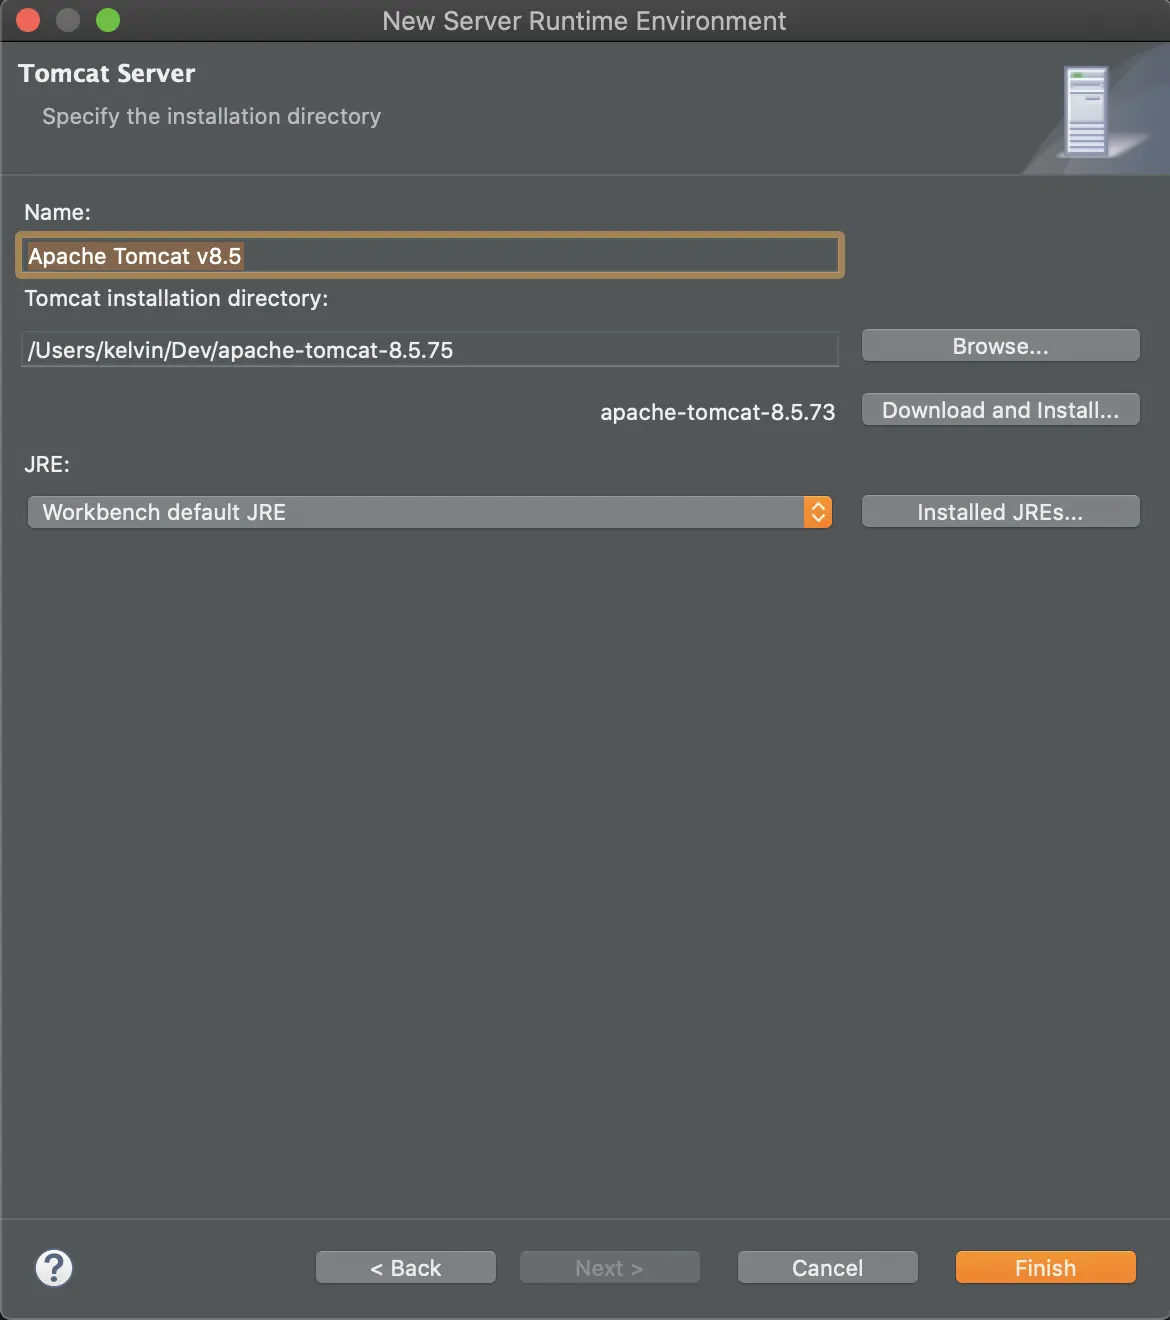
- Open Windows → Preferences → Server → Runtime Environments;
- Configure the Apache Tomcat installation directory as shown in below figures.
Program a @GET API
In this first example, we will show you how to program an API with GET method. We note that GET method is a kind of HTTP request methods to indicate the desired action to be performed for a given resource. Before beginning, we need to configure the project as follows:
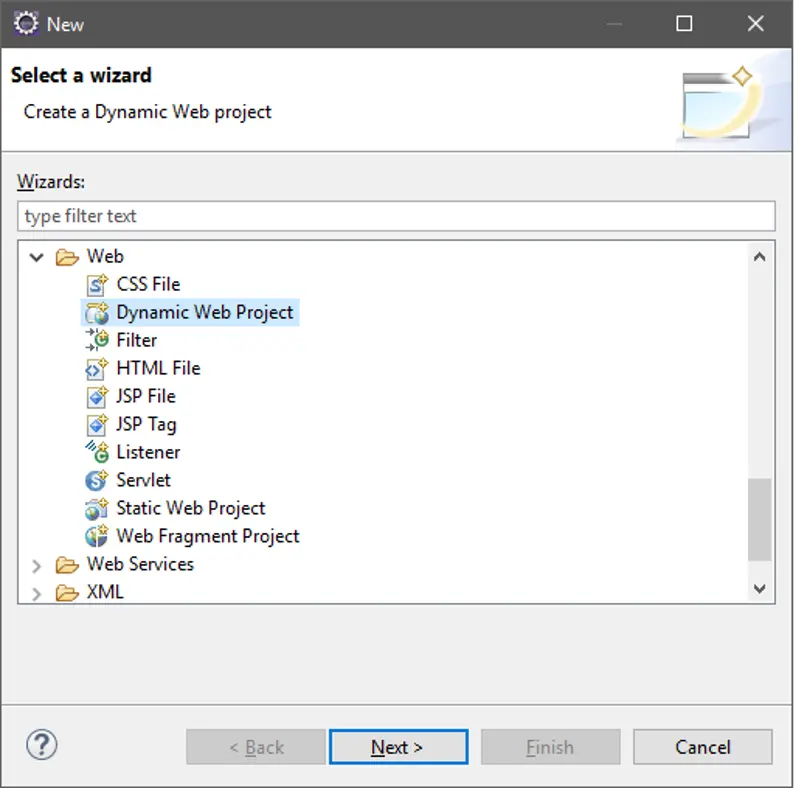
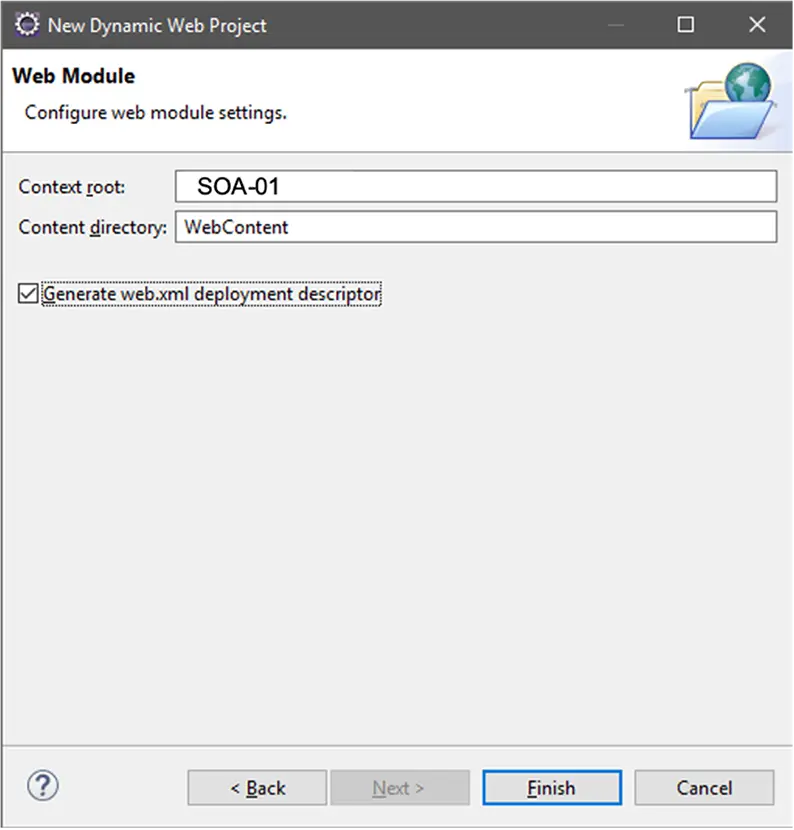
- Open Eclipse IDE and create a new Dynamic Web Project, as shown in below figures.
-
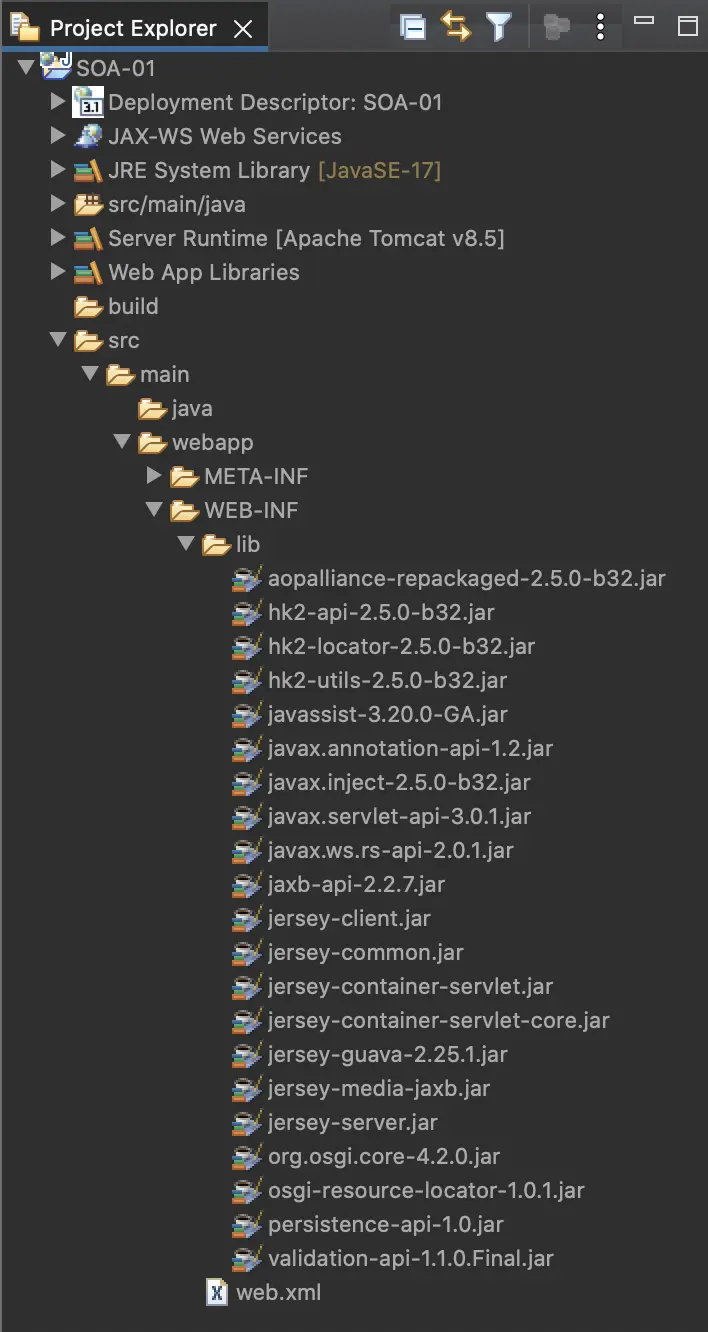
After creating the project, you need to configure its build path, and the results should look like in Fig. 5.
- Option 1 — Extract all JARs in jaxrs-ri/api, jaxrs-ri/ext, jaxrs-ri/lib from Jersey to src/main/webapp/WEB-INF/lib directory.
- Option 2 — I have already bundled all necessary libraries and dependencies of this sample project, you just need to copy-and-paste them to src/main/webapp/WEB-INF/lib directory. Visit the Resources section to download the file.
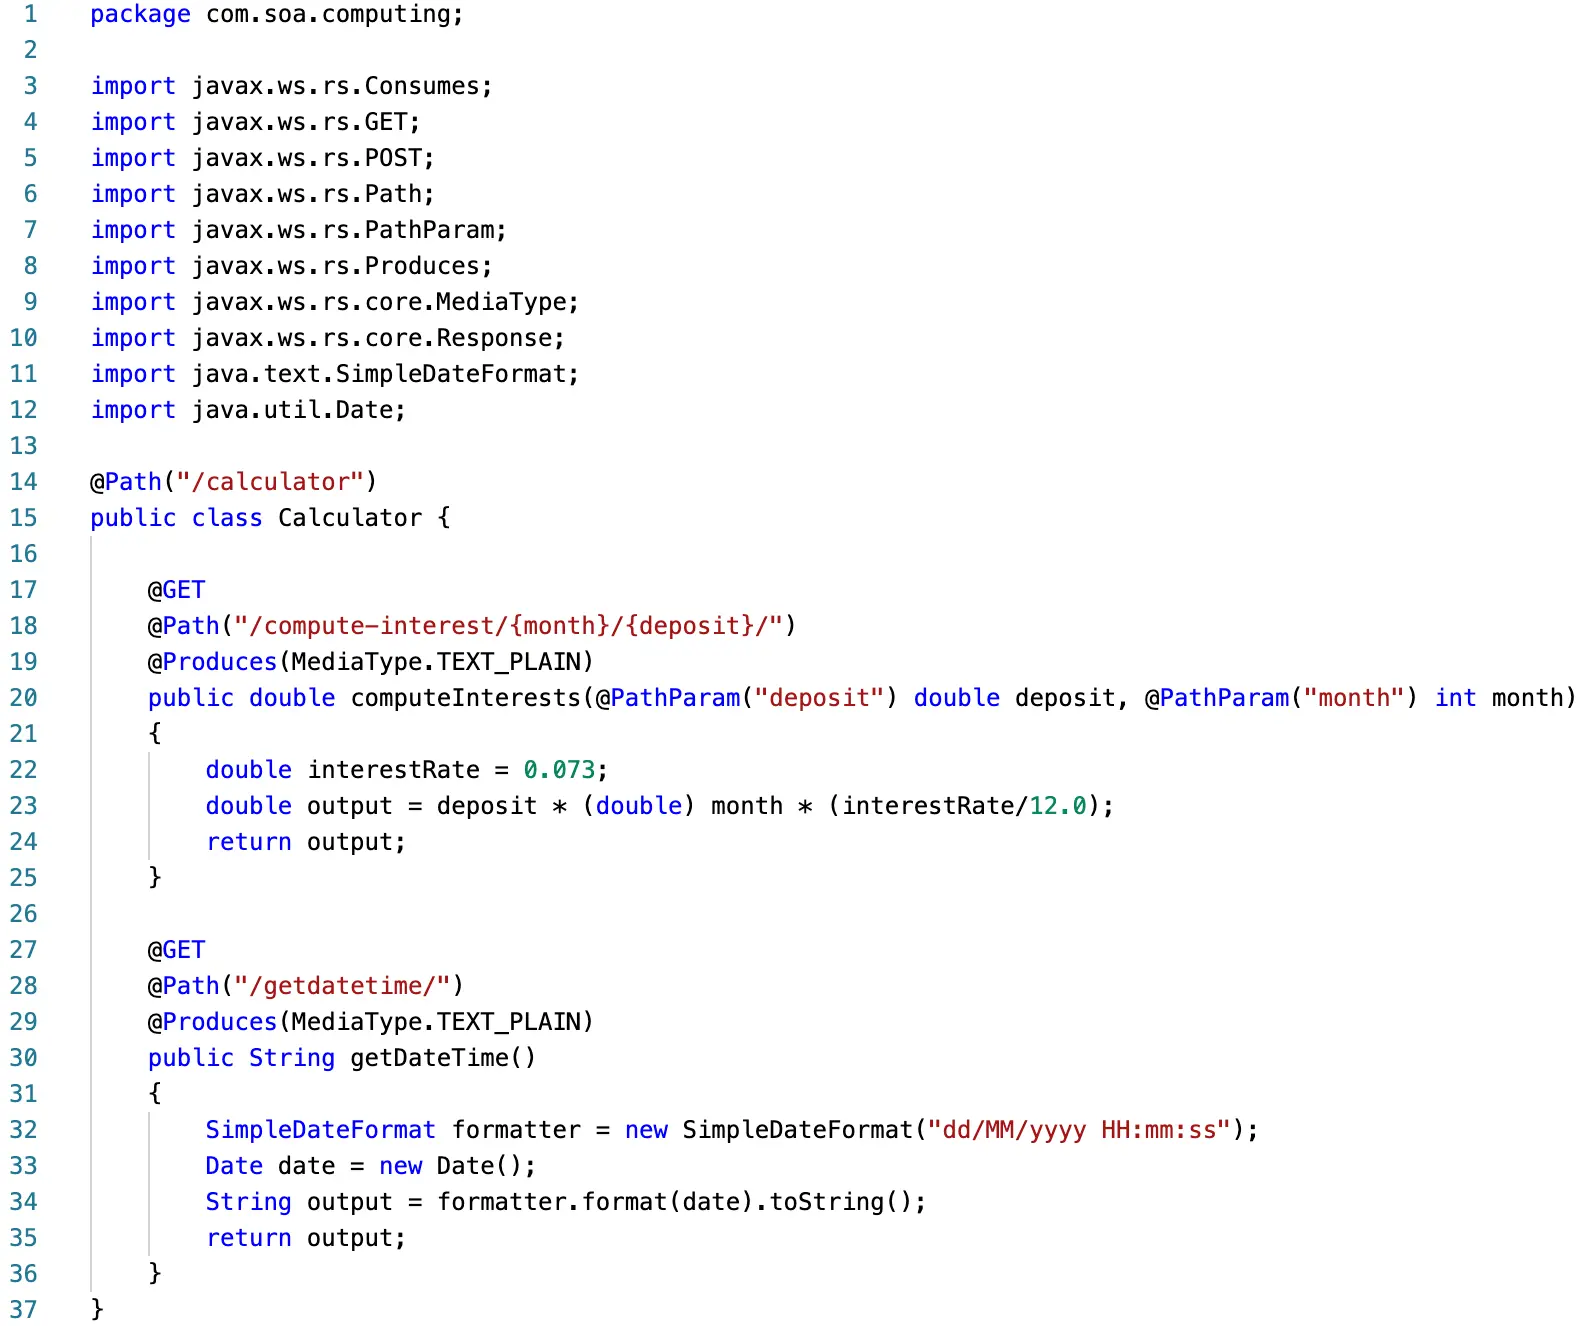
- Next, create a package name
com.soa.computingand a Calculator.java class, as shown in Fig. 6. According to the Oracle documentation, the@Pathannotation identifies the URI path template to which the resource responds, and is specified at the class level of a resource. The@Pathannotation's value is a partial URI path template relative to the base URI of the server on which the resource is deployed, the context root of the WAR, and the URL pattern to which the Jersey helper servlet responds. URI path templates are URIs with variables embedded within the URI syntax. These variables are substituted at runtime in order for a resource to respond to a request based on the substituted URI. Variables are denoted by curly braces. To obtain the value of the username variable, the@PathParamannotation may be used on the method parameter of a request method. - Before deploying this project as a WebAPI, you need to configure web.xml file located in /WebContent/WEB-INF directory as follows:
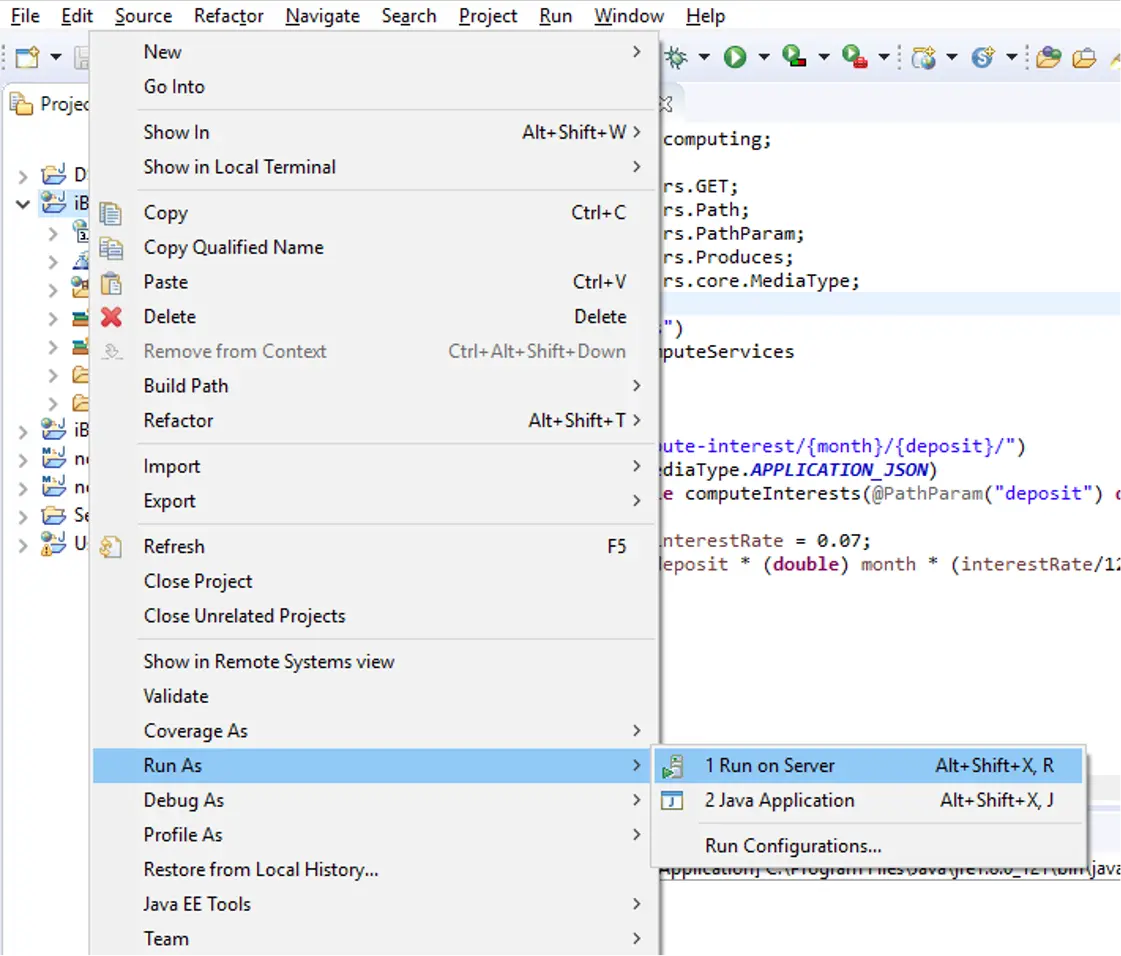
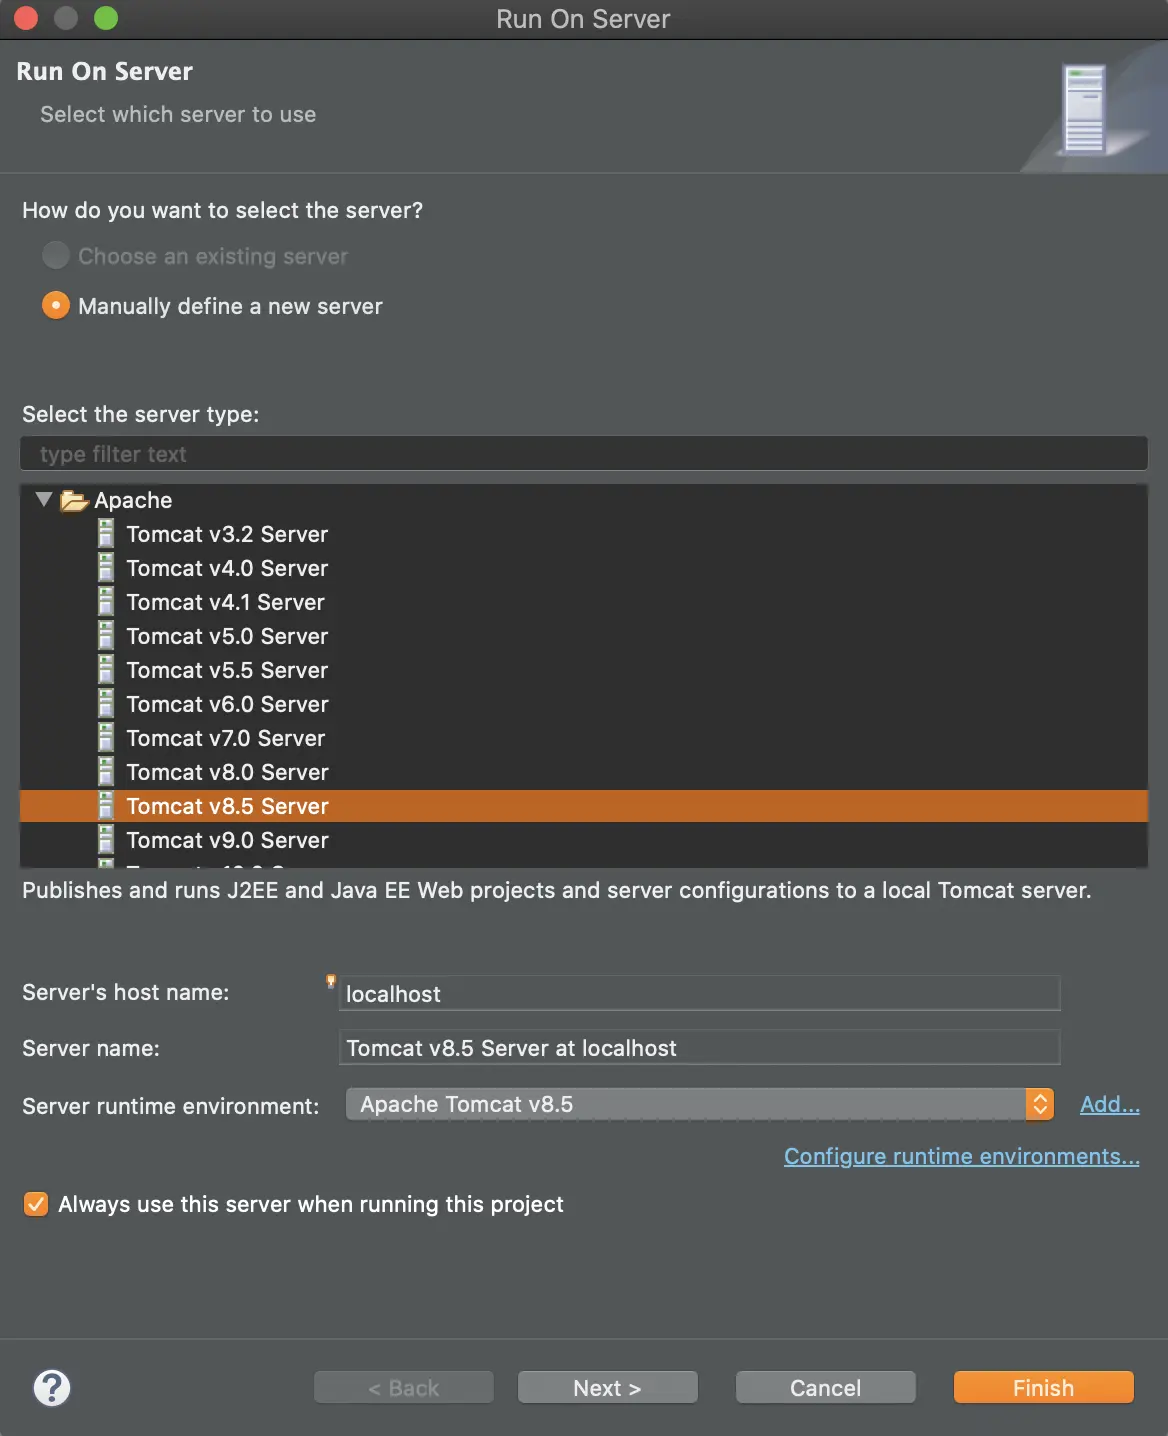
- Now, you can deploy and run your project on Apache Tomcat server as shown in below figures. The first time when you run your project, Eclipse IDE will ask you to confirm the runtime environment, as we presented in IDE Configurations section. In the next step, we will present how to test (or call) your programmed API.
- After deploying your project (or APIs) to Apache Tomcat server, we can now request the implemented APIs and get corresponding responses. To do this, we use Postman software with the configurations as shown in below figure.


Program a @POST API
- In previous section, we implement a
@GETmethod whose aim is to request a representation of the specified resource. In this section, we implement a@POSTmethod to submits an entity to the specified resource, often causing a change in state or side effects on the server. - Before implementing a
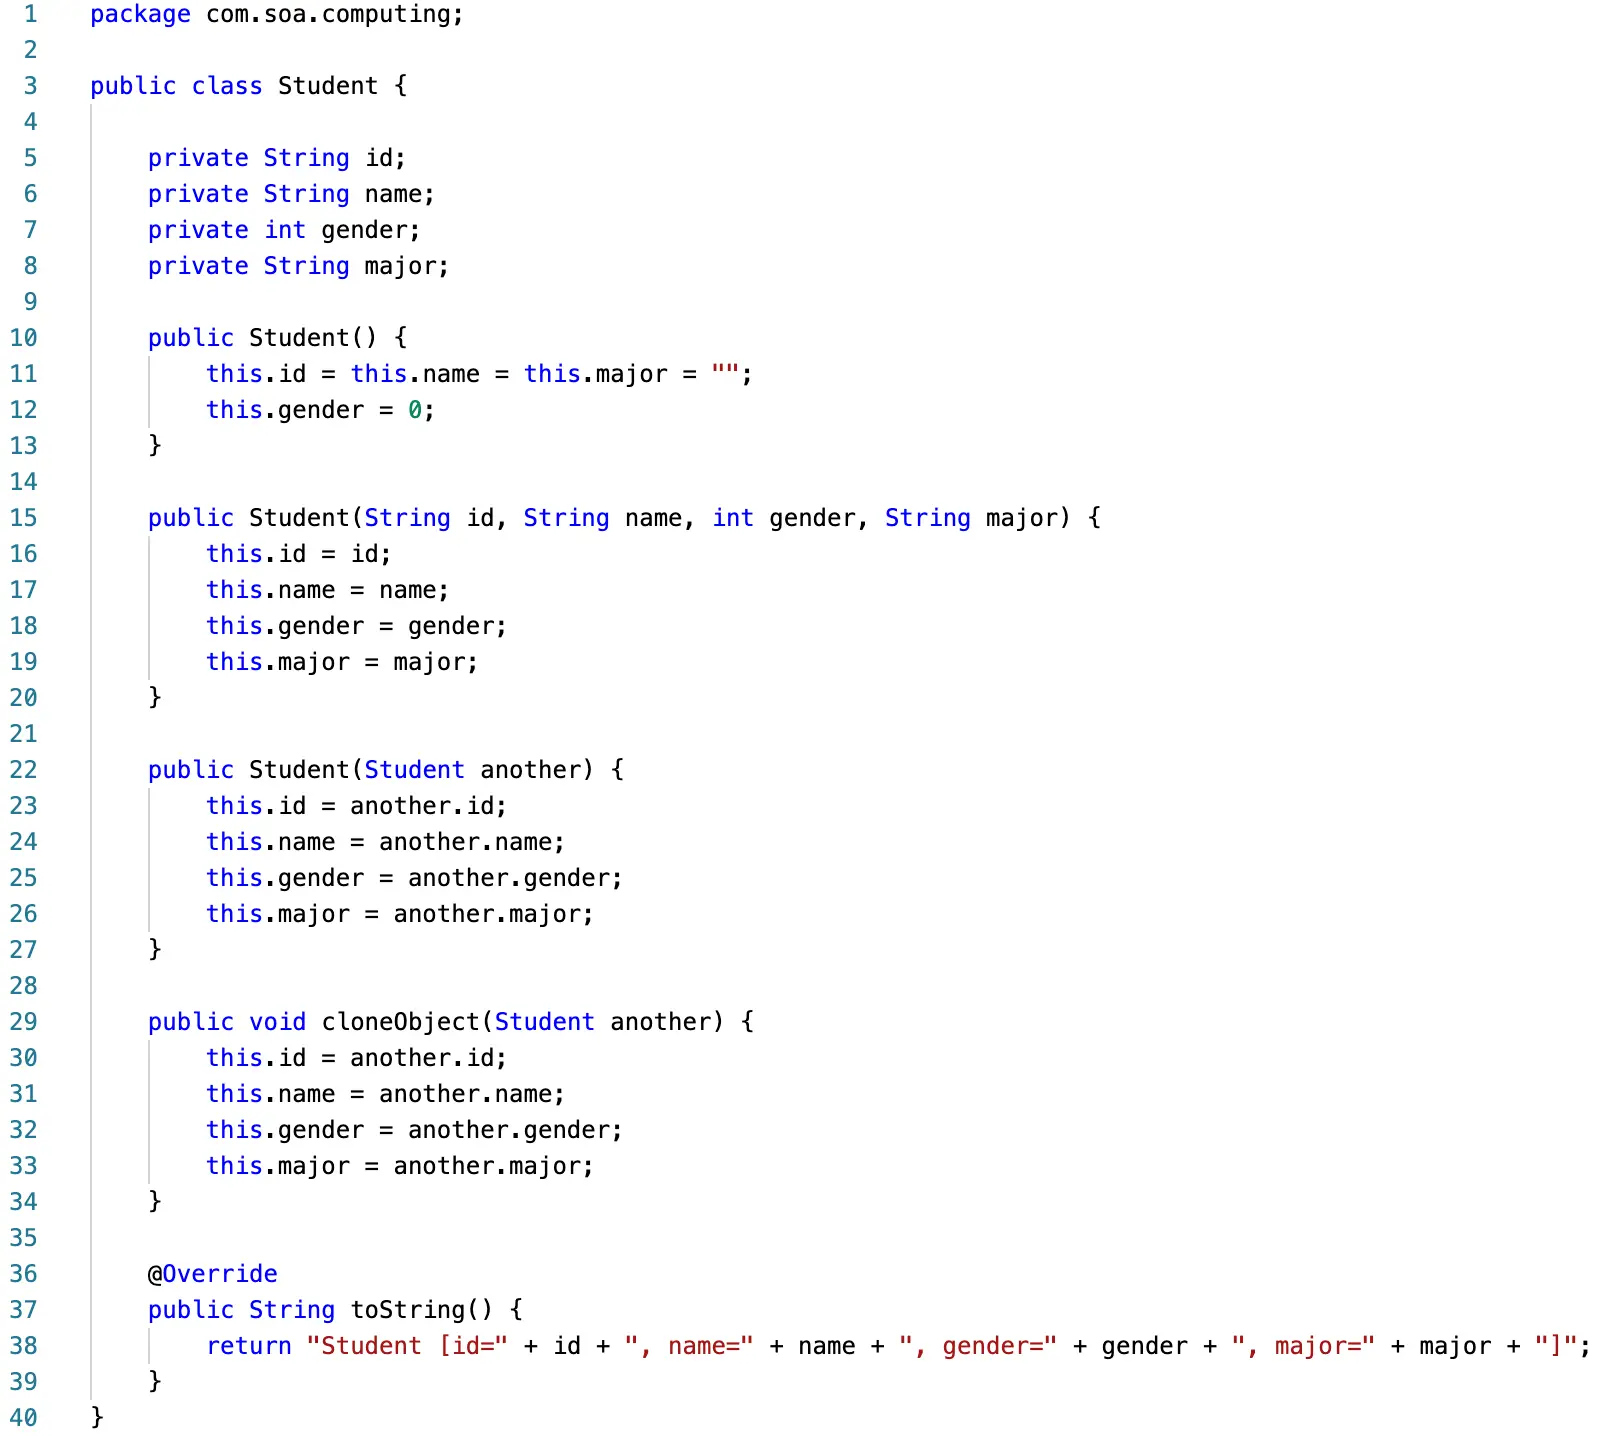
@POSTmethod, we need to implement a Student.java class that represents a Student object in real-world. We assume a Student has four properties, i.e.,id:String,name:String,gender:int,major:String, as shown in below figure. -
After implementing Student.java class, we can now implement a
@POSTmethod in Calculator.java, as shown in below figure. You can implement this method in another class. There are two nothworthy points in this method:- The
@Consumesannotation is used to specify which MIME media types of representations a resource can accept, or consume, from the client. If@Consumesis applied at the class level, all the response methods accept the specified MIME types by default. If applied at the method level,@Consumesoverrides any@Consumesannotations applied at the class level. If a resource is unable to consume the MIME type of a client request, the JAX-RS runtime sends back an HTTP 415 ("Unsupported Media Type") error. The value of@Consumesis an array of String of acceptable MIME types such astext/plain,text/html. - Mapping a JSON Object — The input of this method is a
Studentobject that send from a client, and the question here is how this method can map an JSON object from client to a Java object (Student). POJO suppport represents the easiest way to convert your Java Objects to JSON and back which is based on the Jackson library. To use this approach, you will need to turn theJSONConfiguration.FEATURE_POJO_MAPPINGfeature on which could be done in web.xml using the following servlet init parameter, as shown in below figure. For further reading, you can refer to this article to learn more about Jersey JSON.
- The
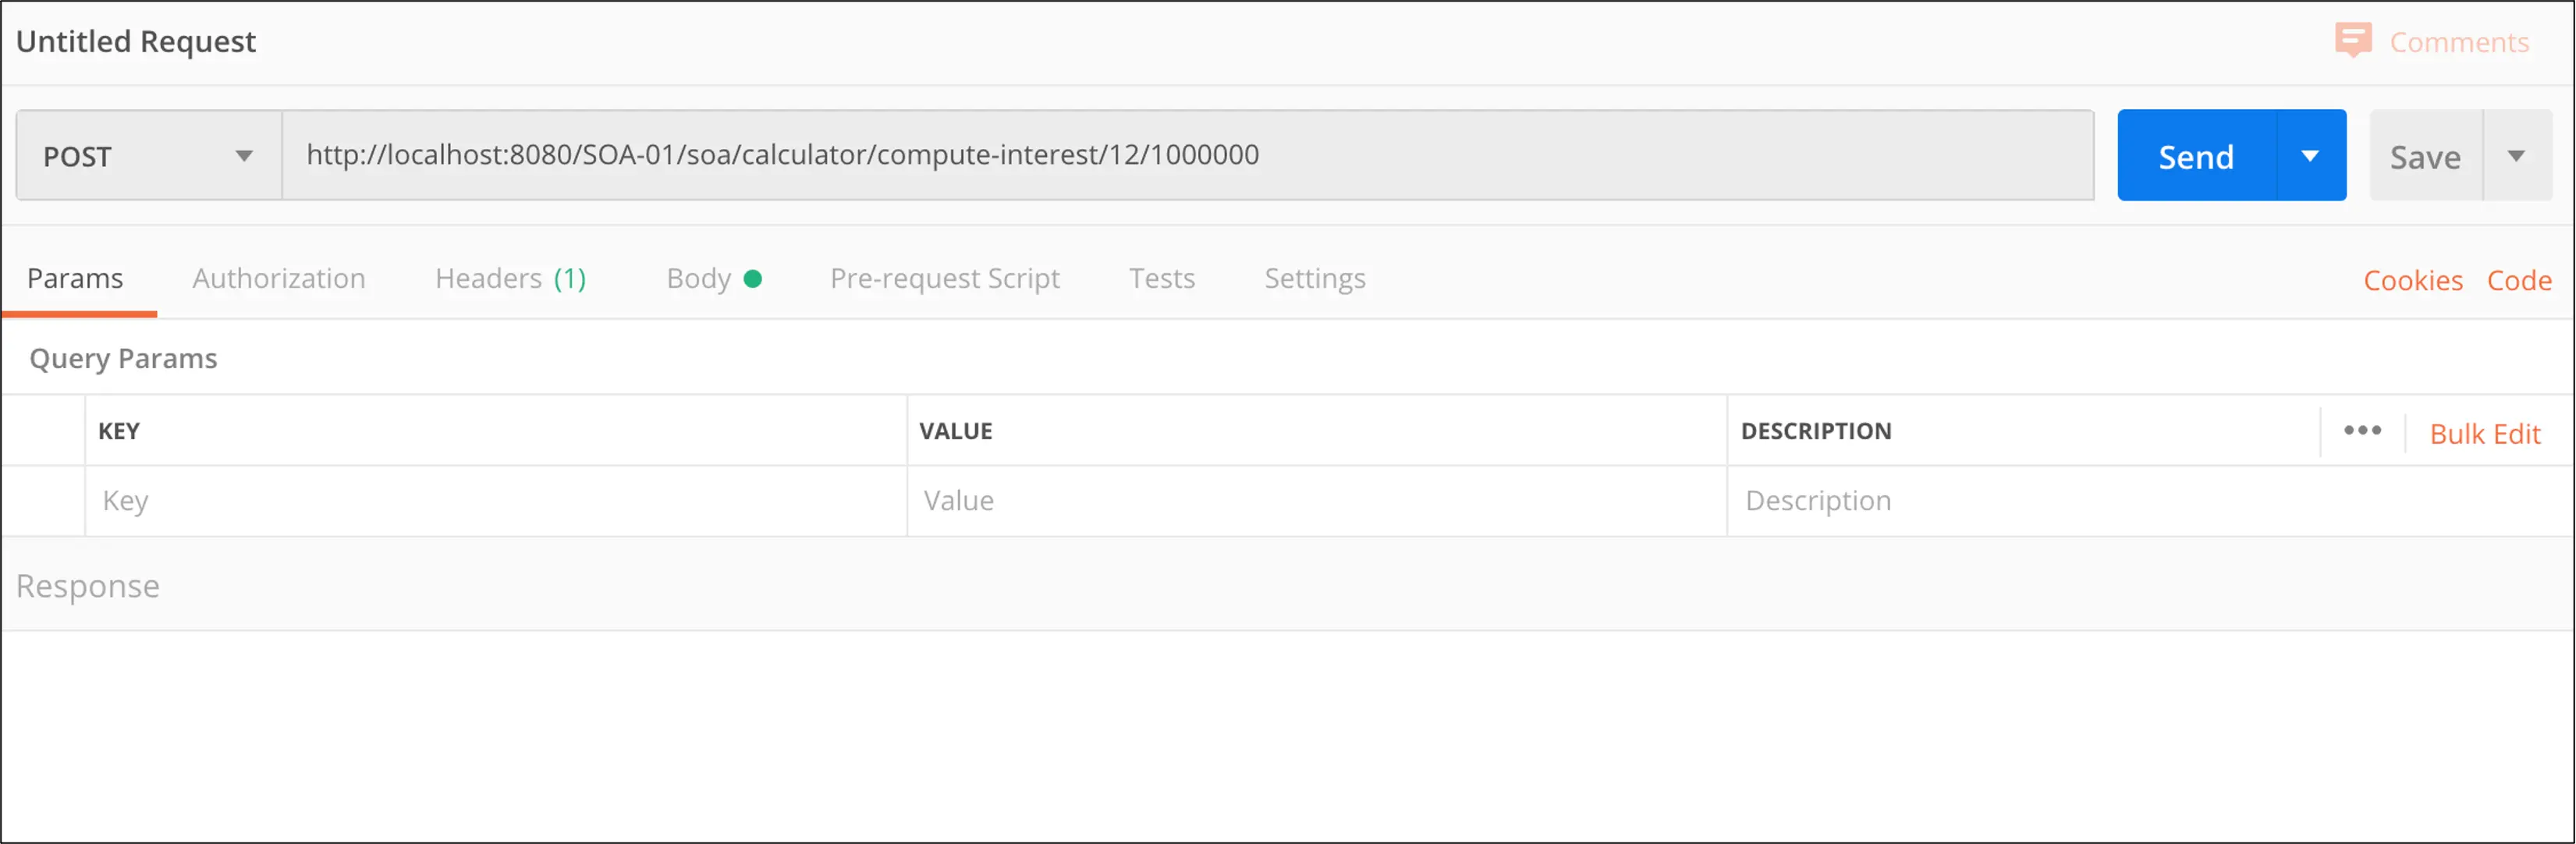
- To test this new
@POSTAPI, we need to use Postman software with the configurations as shown in below figure. After submitting the request, the API will (1) return a message to client to inform the results, and (2) print theStudentobject on server's console window.
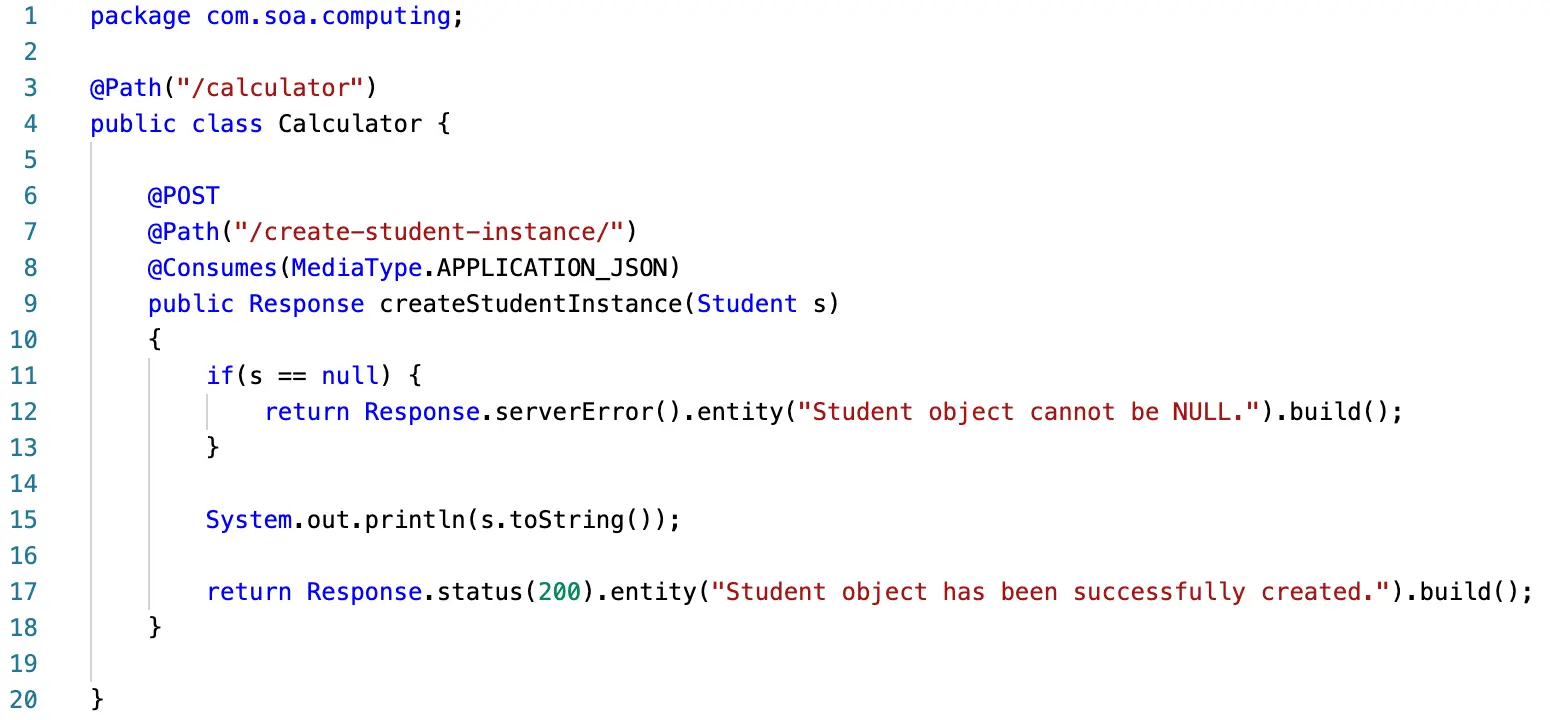
@POST method
Jersey-POJOMappingFeature in web.xml configuration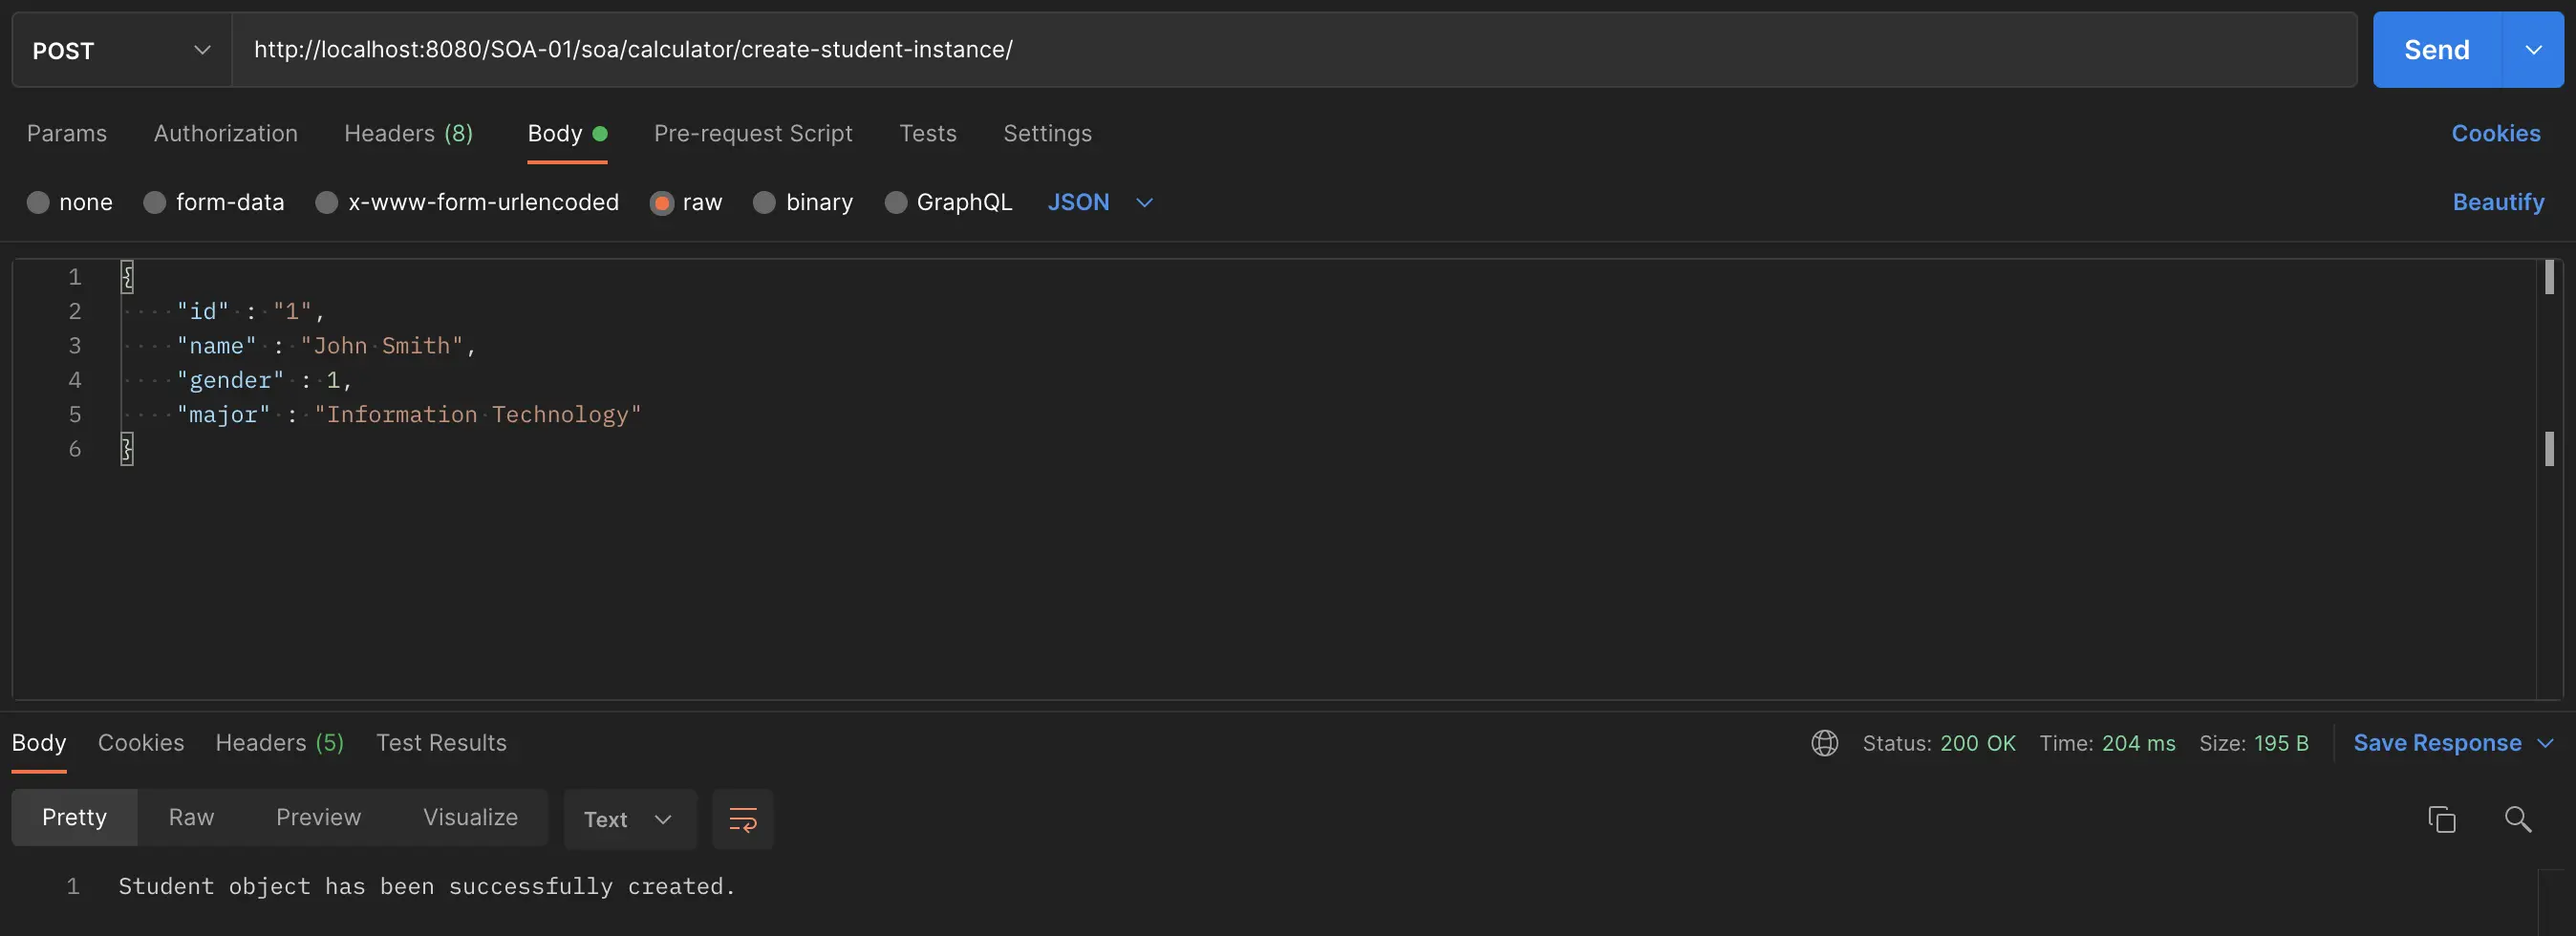
@POST API.Exercises
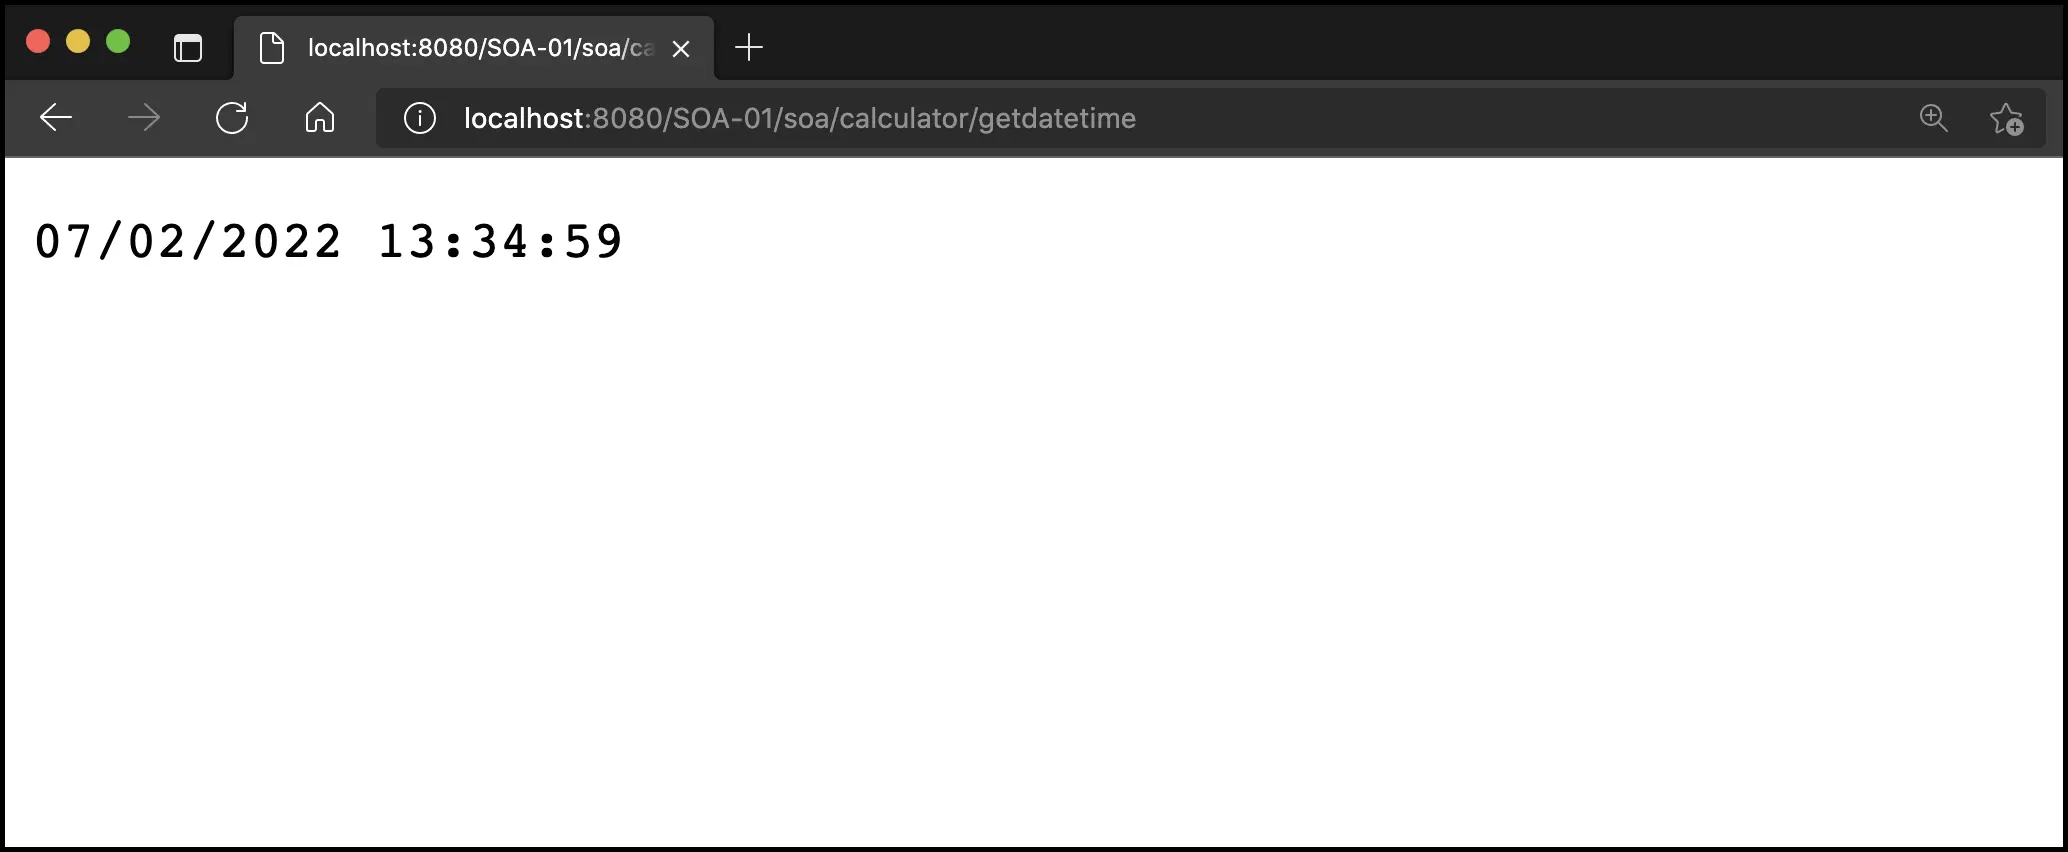
- Continue with the function
GetDateTimefrom the sample project, you are required to modify this method that allows a client passes location information as a parameter such asAmerica/Chicago,Europe/Bucharest, then the method return the current date-and-time of the given location. To implement this methods, you can take advantage of Joda-Time library which has been already bundled as presented in Resources section. - Continue with the demo of Student object from the sample project, you are required to implement a method that inputs an
idof a student and returns TRUE/FALSE where TRUE indicates the givenidexists in the database, and vice versa. To implement this method, you do not need to construct a database, just declare an array/list of students. - Continue with the demo of Student object from the sample project, based on the idea of SETTER method of OOP, you are required to implement a set of methods that allows a client change student's information. For example,
public Response changeGender(int id, int gender)method does change thegenderproperty of a student to the new one based on the givenidinformation; then, the method returns HTTP response status codes to inform the results. - Instead of returning
Responseobjects, you are required to modify the previous methods to make them return JSON objects. For example,public boolean searchStudentById(String id)method is changed topublic Student searchStudentById(String id)to return a JSON object that represents a student, otherwise, returnNULLor a dumb object. You can read this article to know how to convert a Java object to/from JSON object by using Jackson 2 library. - (*) Programming a Webpage that allows a client to interact with APIs and get responses from them.
Further Reading
Troubleshooting
- If you get the following error message
SEVERE: Servlet [Jersey REST Service] in web application [PROJECT_NAME] threw load() exception java.lang.IllegalArgumentException: Unsupported class file major version 59, as shown in Fig. 16a, you should change Java Compiler version from 17 to 1.7 by performing the following steps: Right-click on project name → Properties → Java Compiler → Uncheck the Use compliance from execution environment 'JavaSE-17' on the 'Java Build Path' option → Select 1.7 from the drop-down list of Compiler compliance level → Then, click Apply and Close button to save the changes. - Fixing
404 - Page Not Founderror — When you run your project on Apache Tomcat server, it will automatically open the default webpage (index.html). By default, theindex.htmlfile is absent, it will thus return the404 - Page Not Founderror code, as shown in Fig. 17. To address this problem, we just create anindex.htmlfile insrc/main/webapp/directory. For example, the content ofindex.htmlfile is presented in Fig. 18. - If you get this error message - "Java compiler level does not match the version of the installed Java project facet." - you should re-configure the project facet (Fig. 19) as follows: Right-click on project name → Select Properties → Select Project Facets → Change Java version to 1.7 → Then, click Apply and Close to save changes.
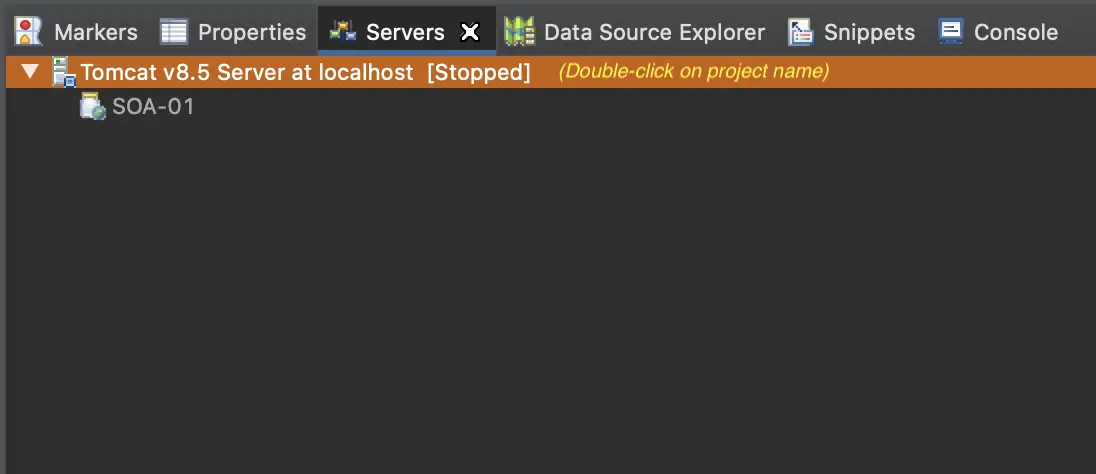
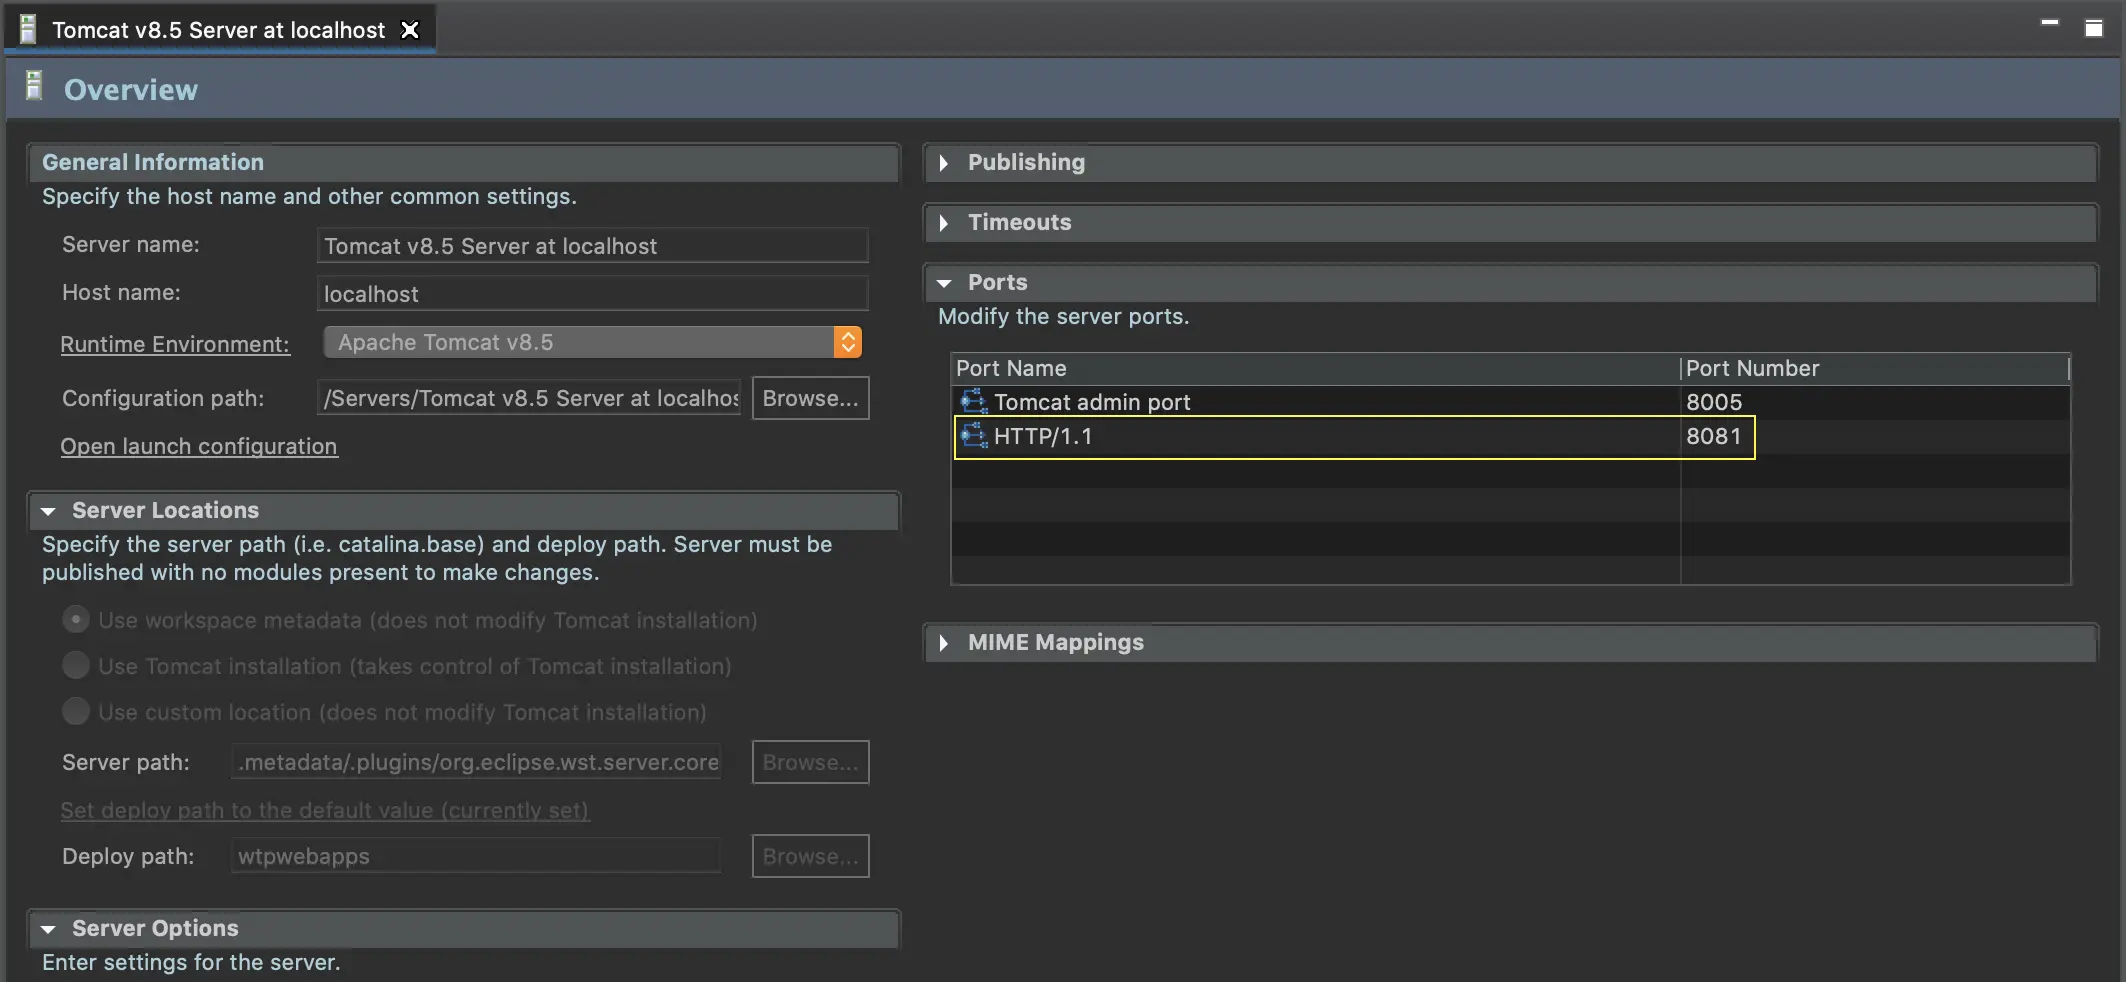
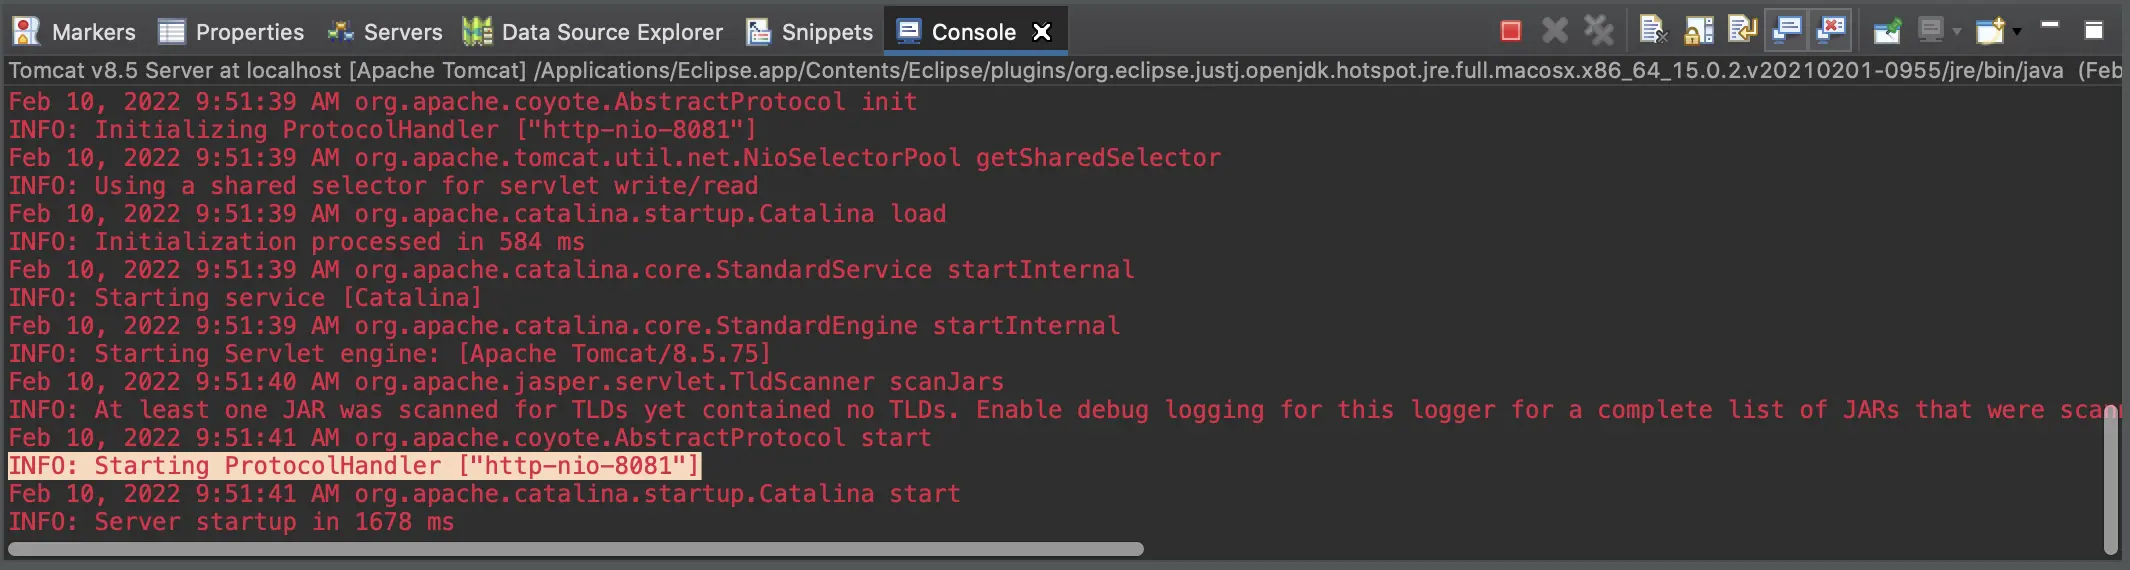
- How to change Tomcat's port in Eclipse — By default, Apache Tomcat is configured to listen on 8005, 8080, 8009 for Tomcat admin port, HTTP/1.1, AJP/1.3, respectively. We can easily change the Tomcat's port by doing the following steps: Double-click on the server name in Servers view (as shown in Fig. 20) → A Tomcat's configuration page will be open and you can change the port to your desire number, as shown in Fig. 21 → Press Ctrl + S (MacOS: Cmd + S) to save changes → Next time when you start your Apache Tomcat server, you can spot the new port value as shown in Fig. 22.
- On macOS, if Eclipse quit unexpectedly with the error message states that
EXC_CRASH (Code Signature Invalid), as shown in Fig. 23, you need to execute thecodesign --force --deep --sign - /Applications/Eclipse.appcommand in Terminal. You should note that the Eclipse application must be placed in /Applications directory before executing the command.
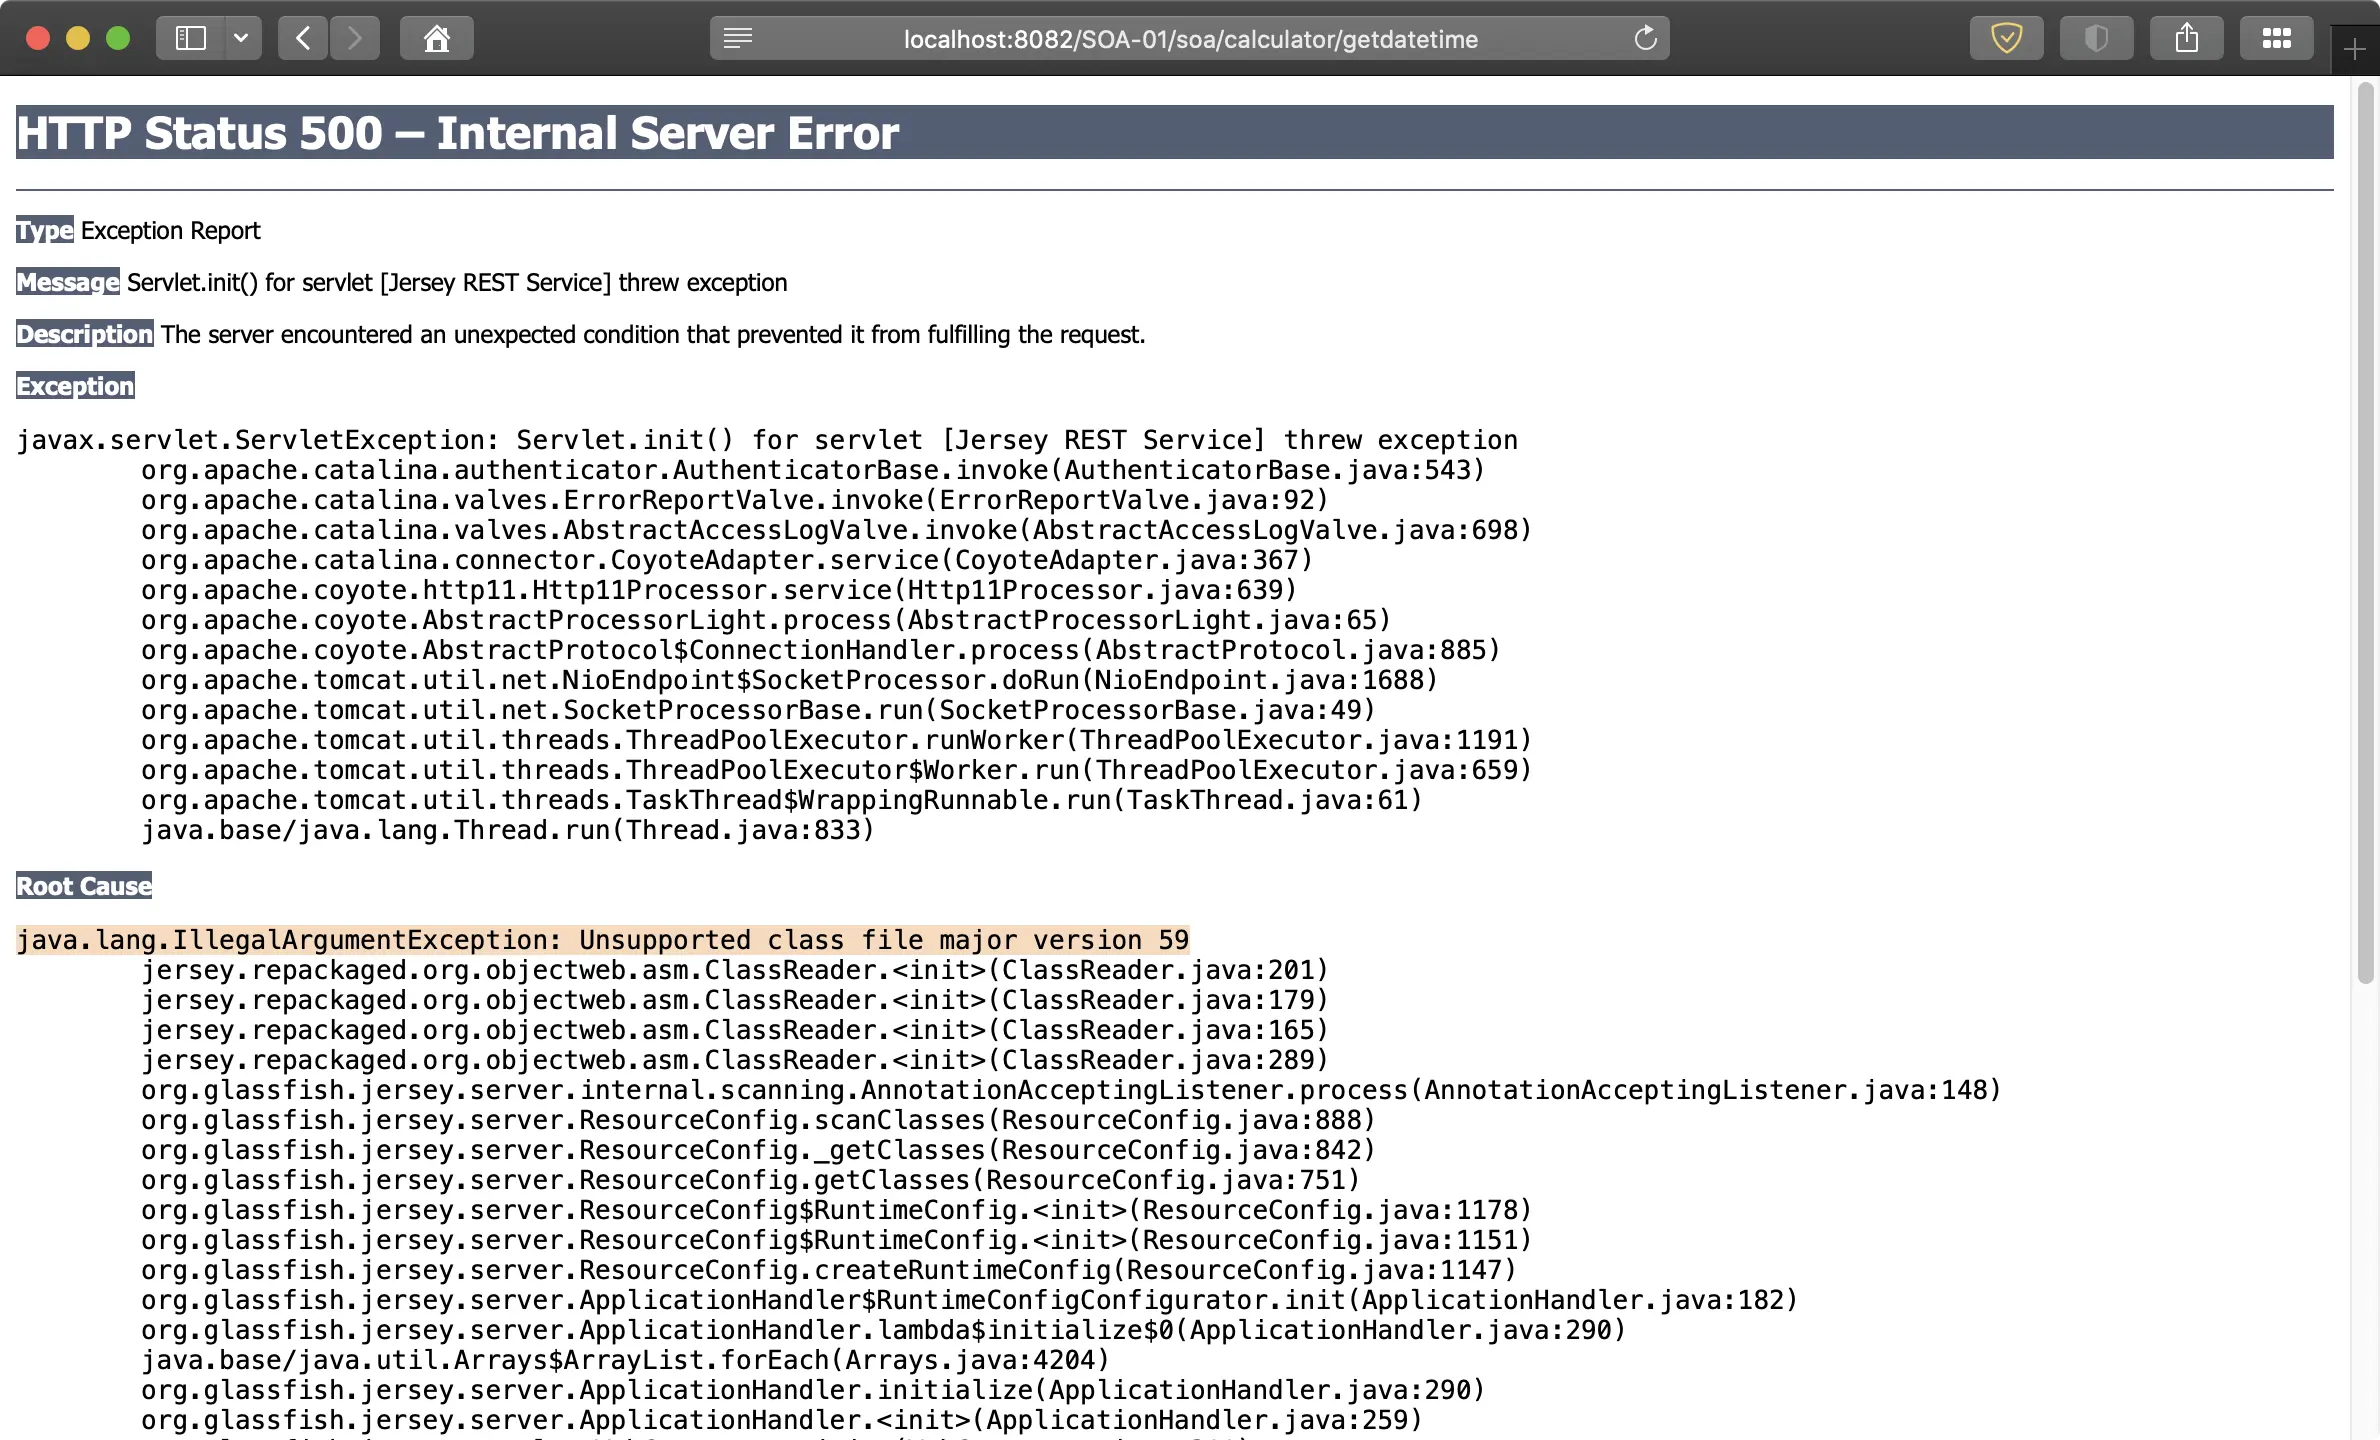
java.lang.IllegalArgumentException exception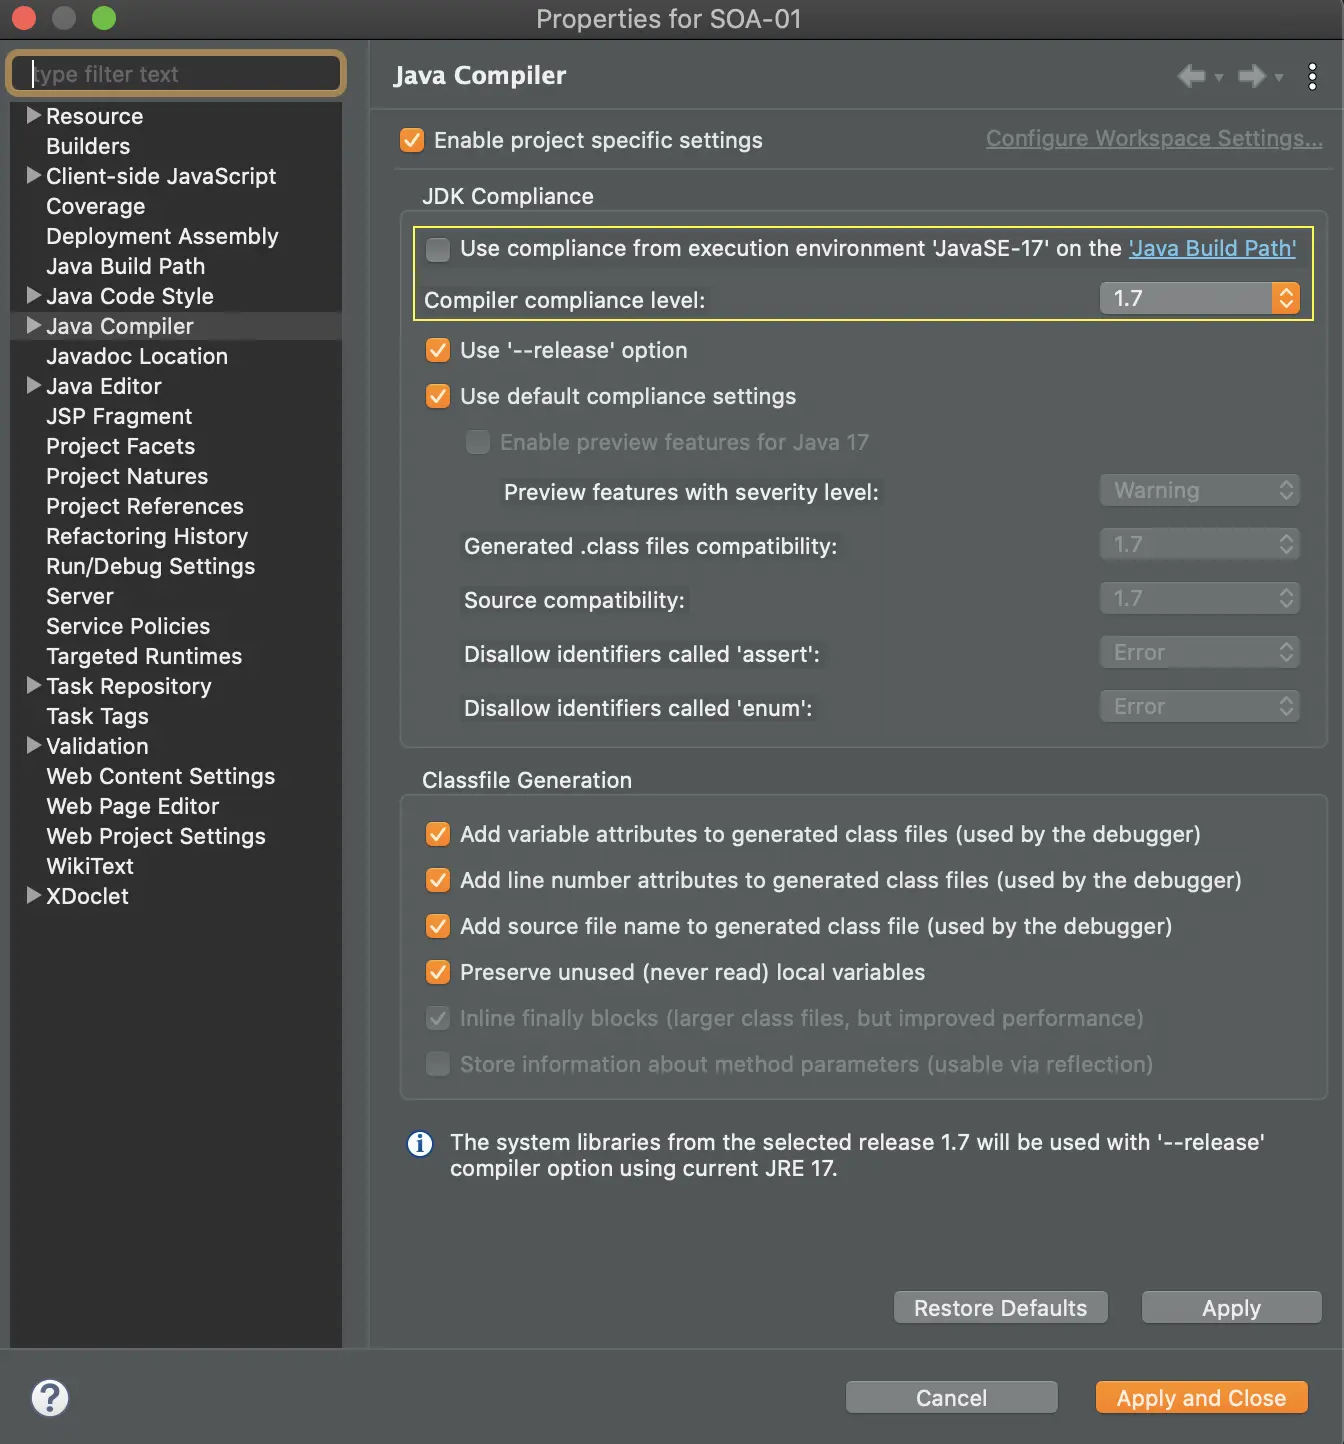
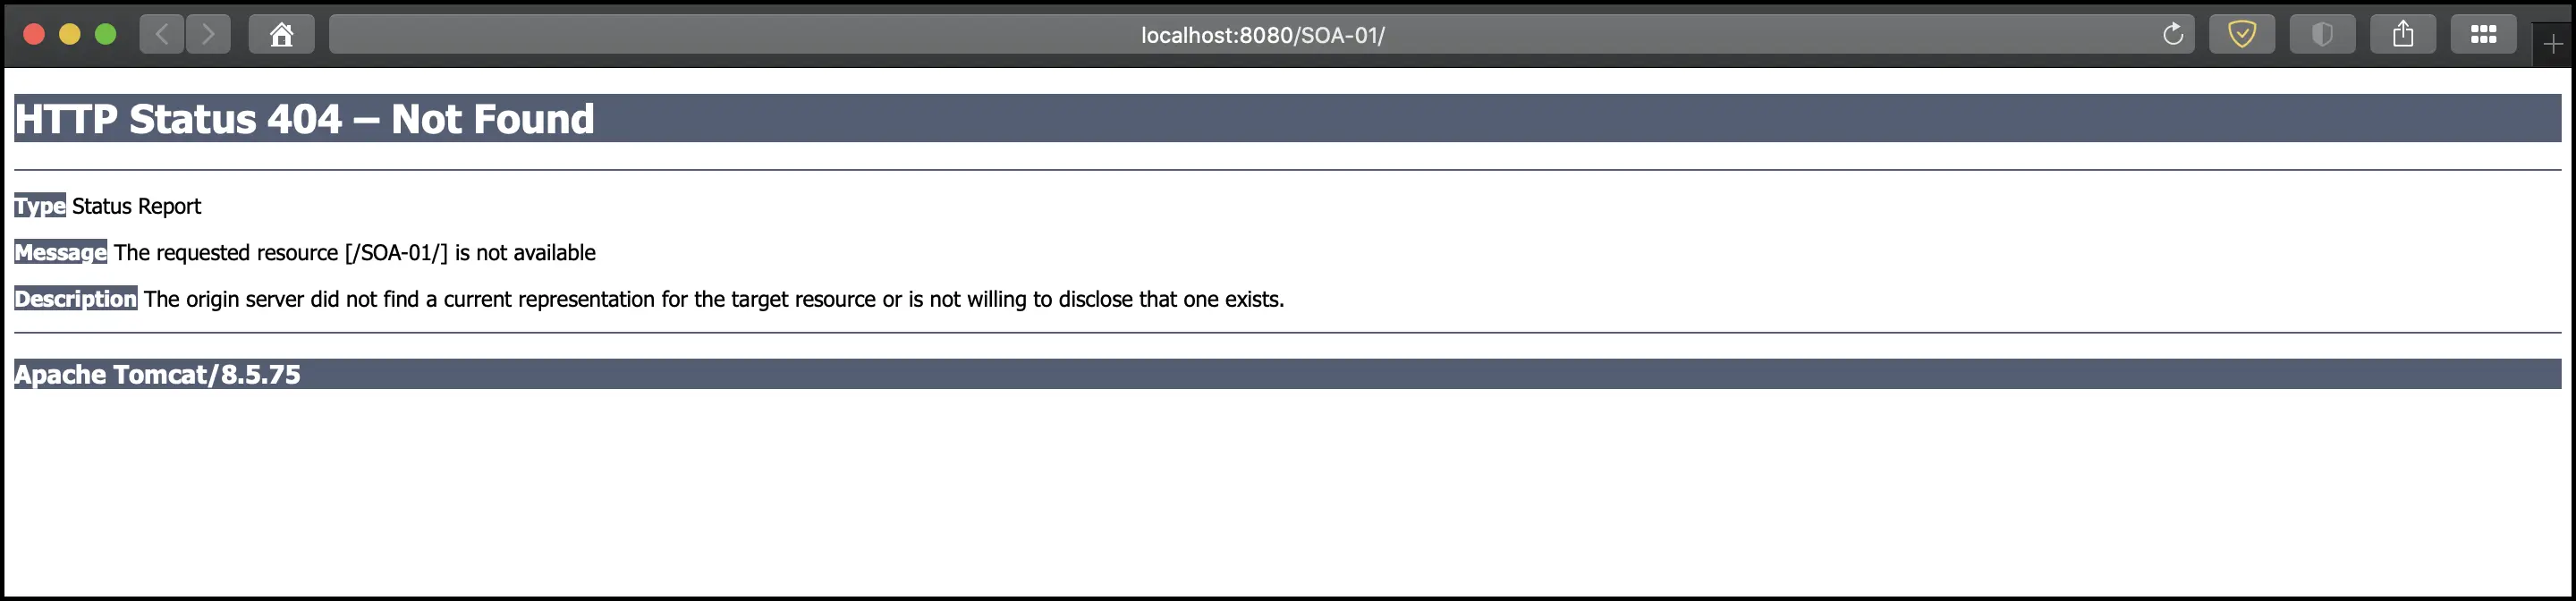
404 - Page Not Found error.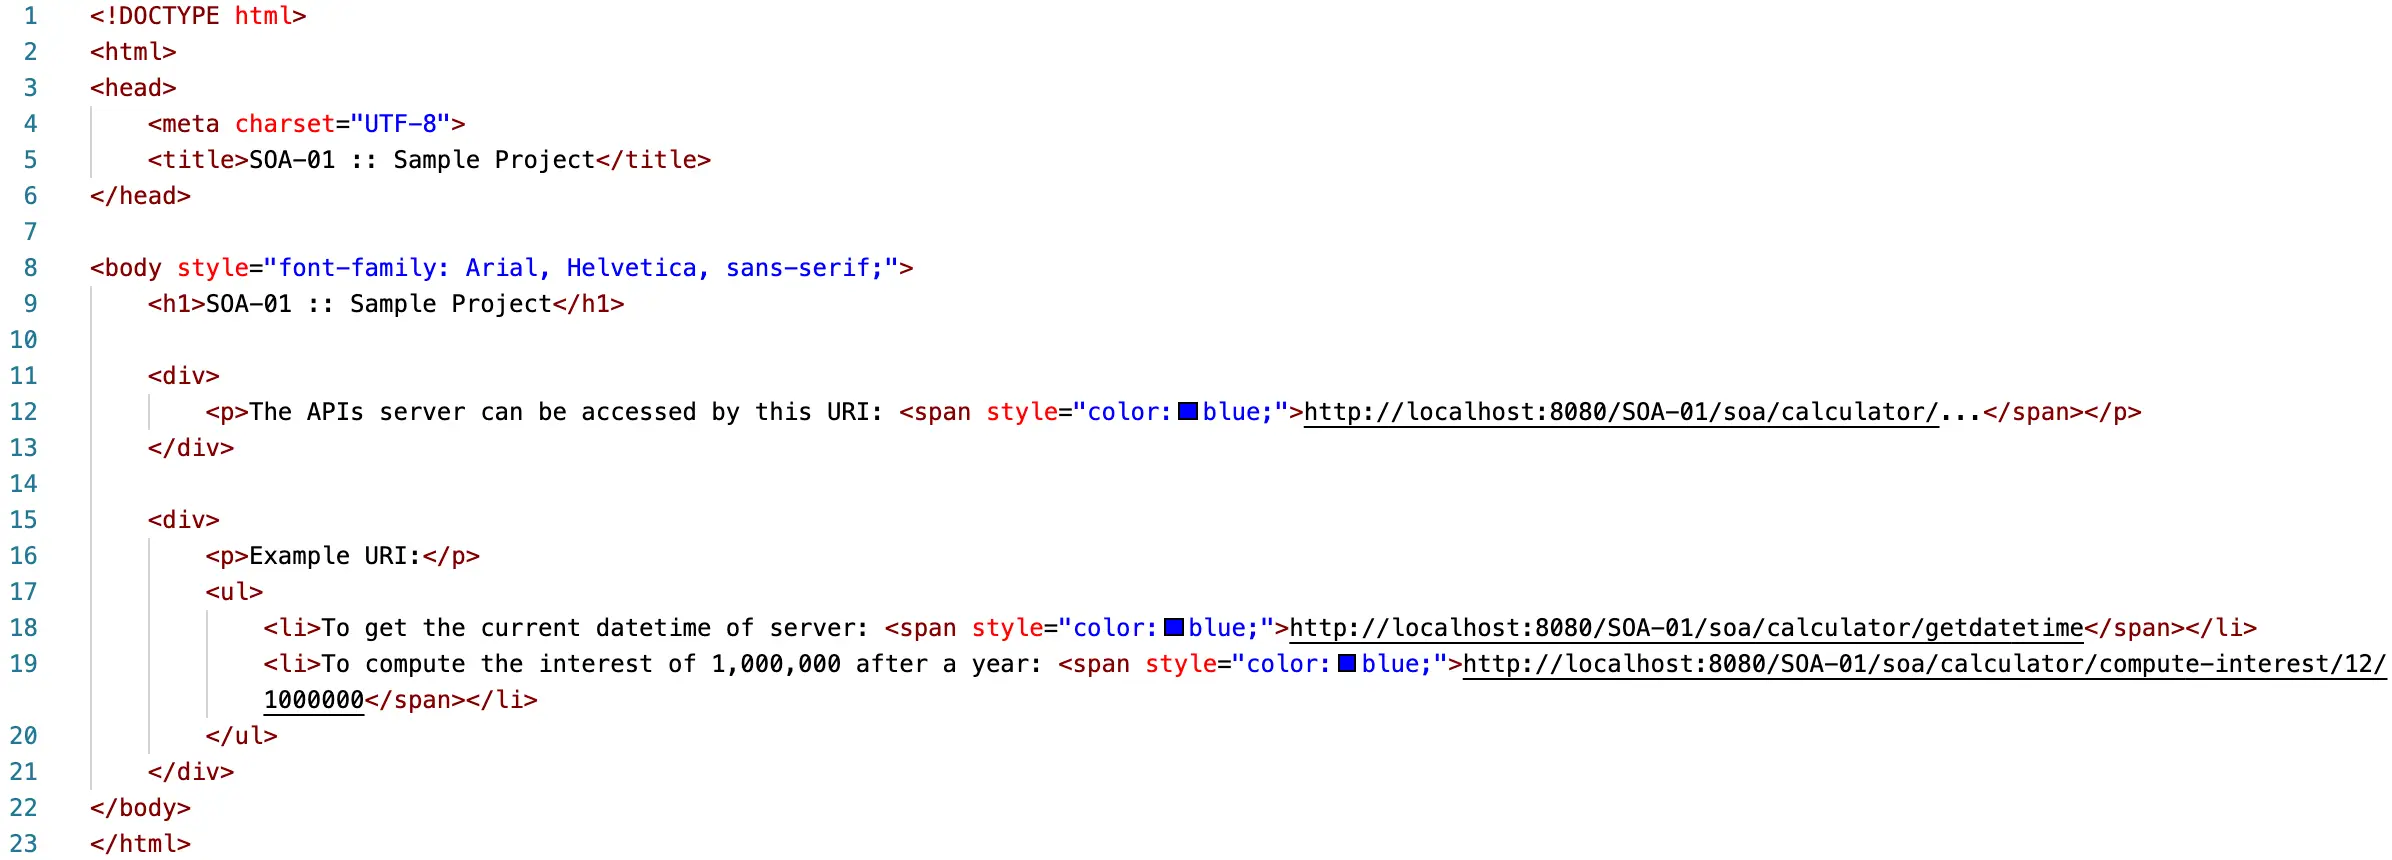
index.html file.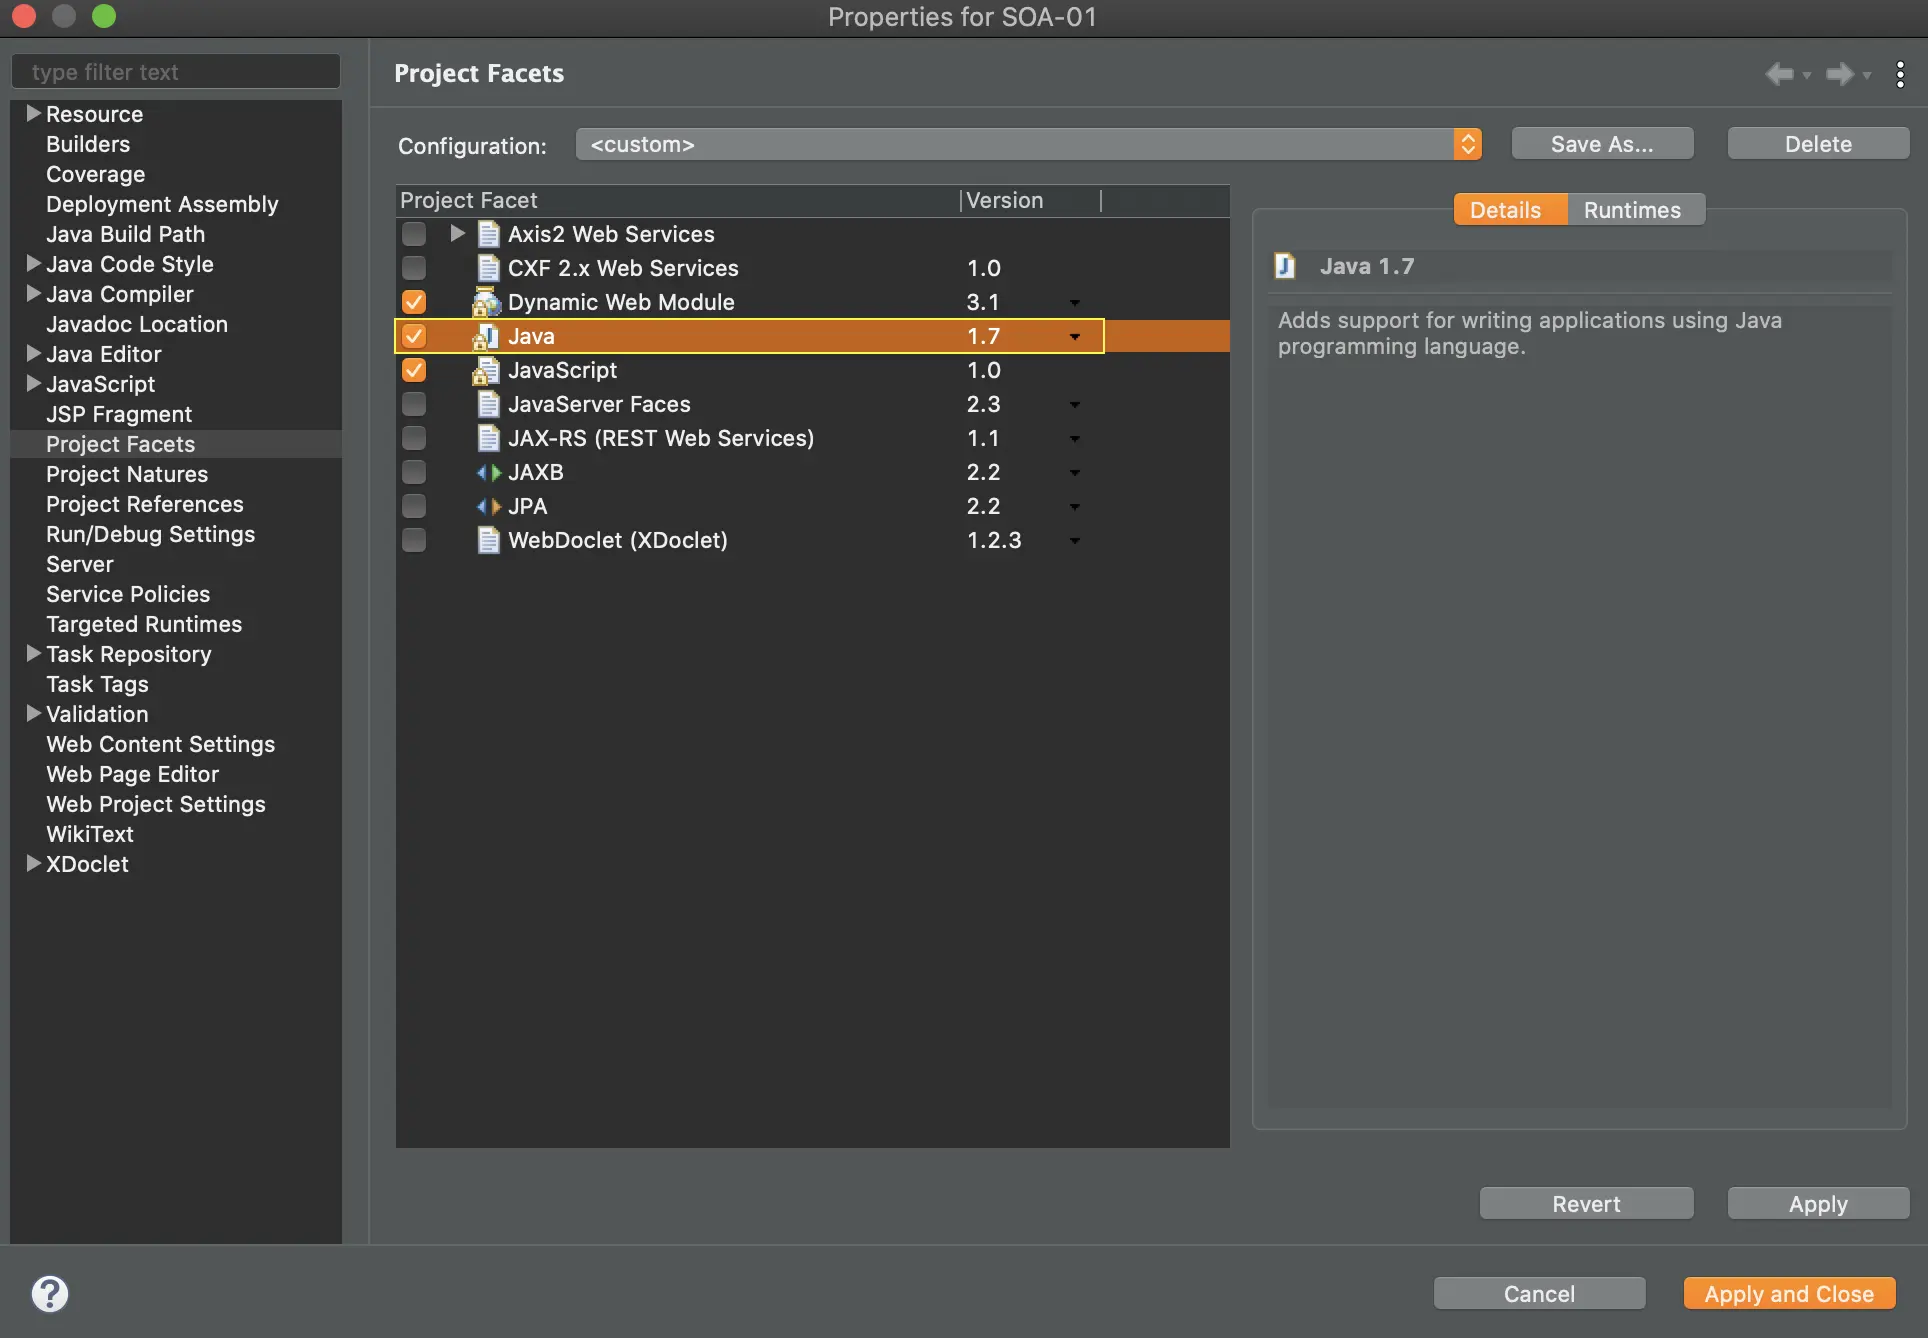
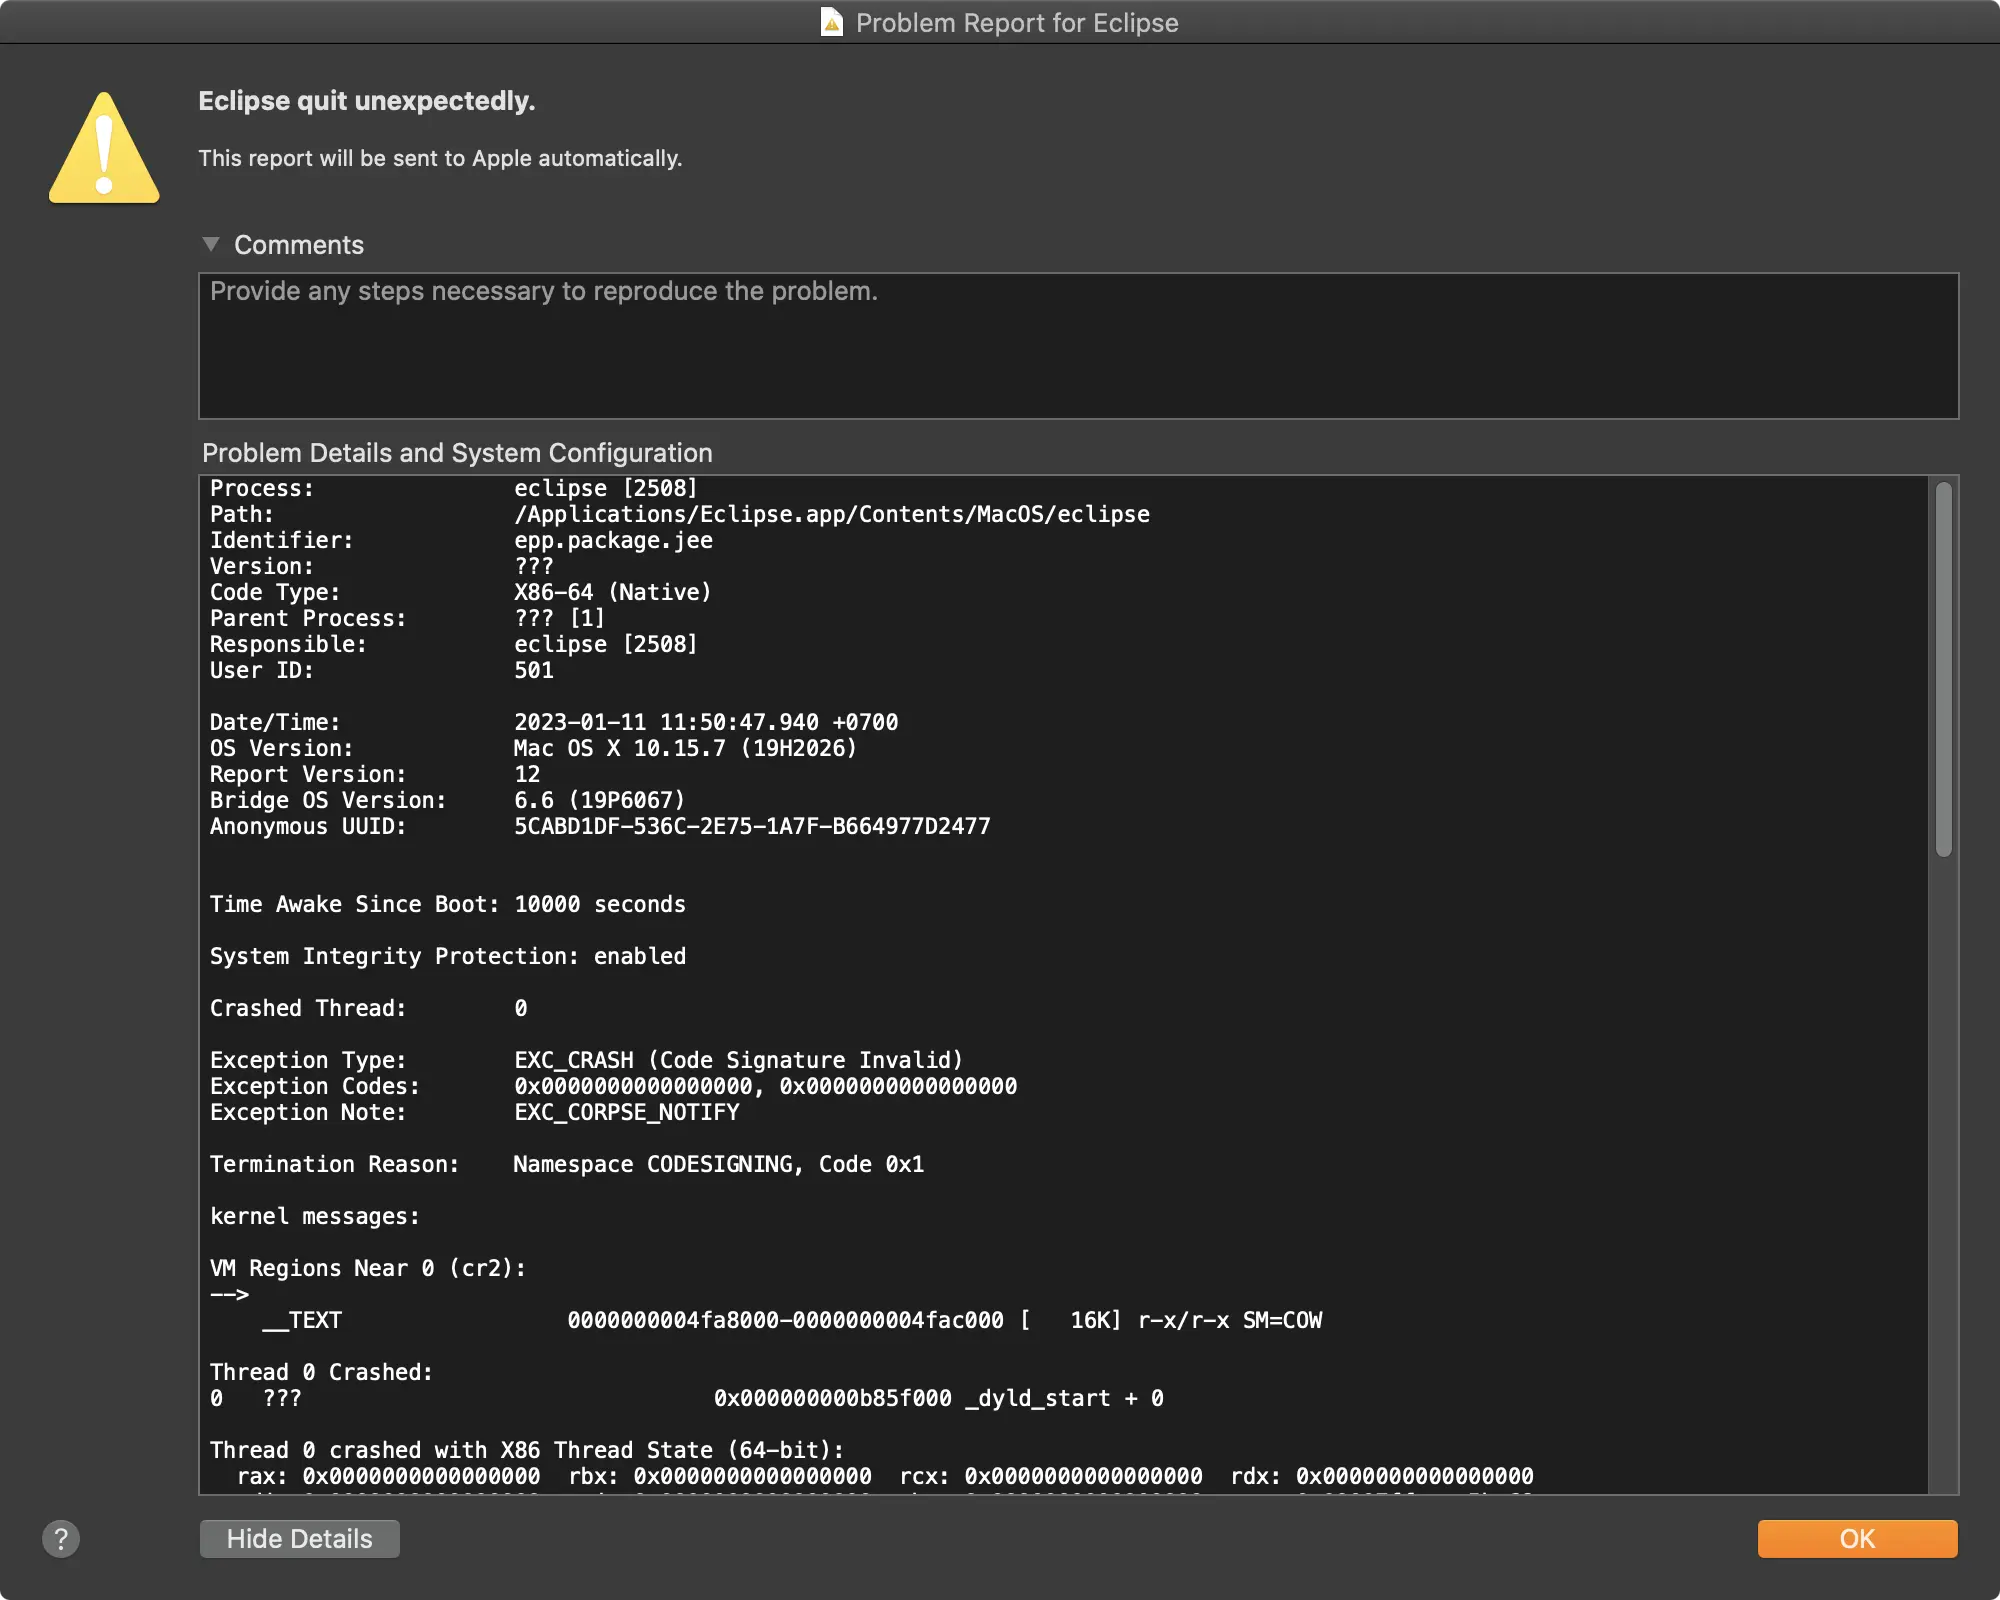
EXC_CRASH (Code Signature Invalid) error when open Eclipse on macOS